🔔 VoIP Push Notification Setup
⚠️ Important Notes:
- Real Device Only: iOS VoIP Push only works on physical devices. It does not work on the Simulator.
- Annual Renewal: VoIP Certificates must be renewed annually on the Apple Developer Portal and updated on the Pitel Portal.
🌟 Overview
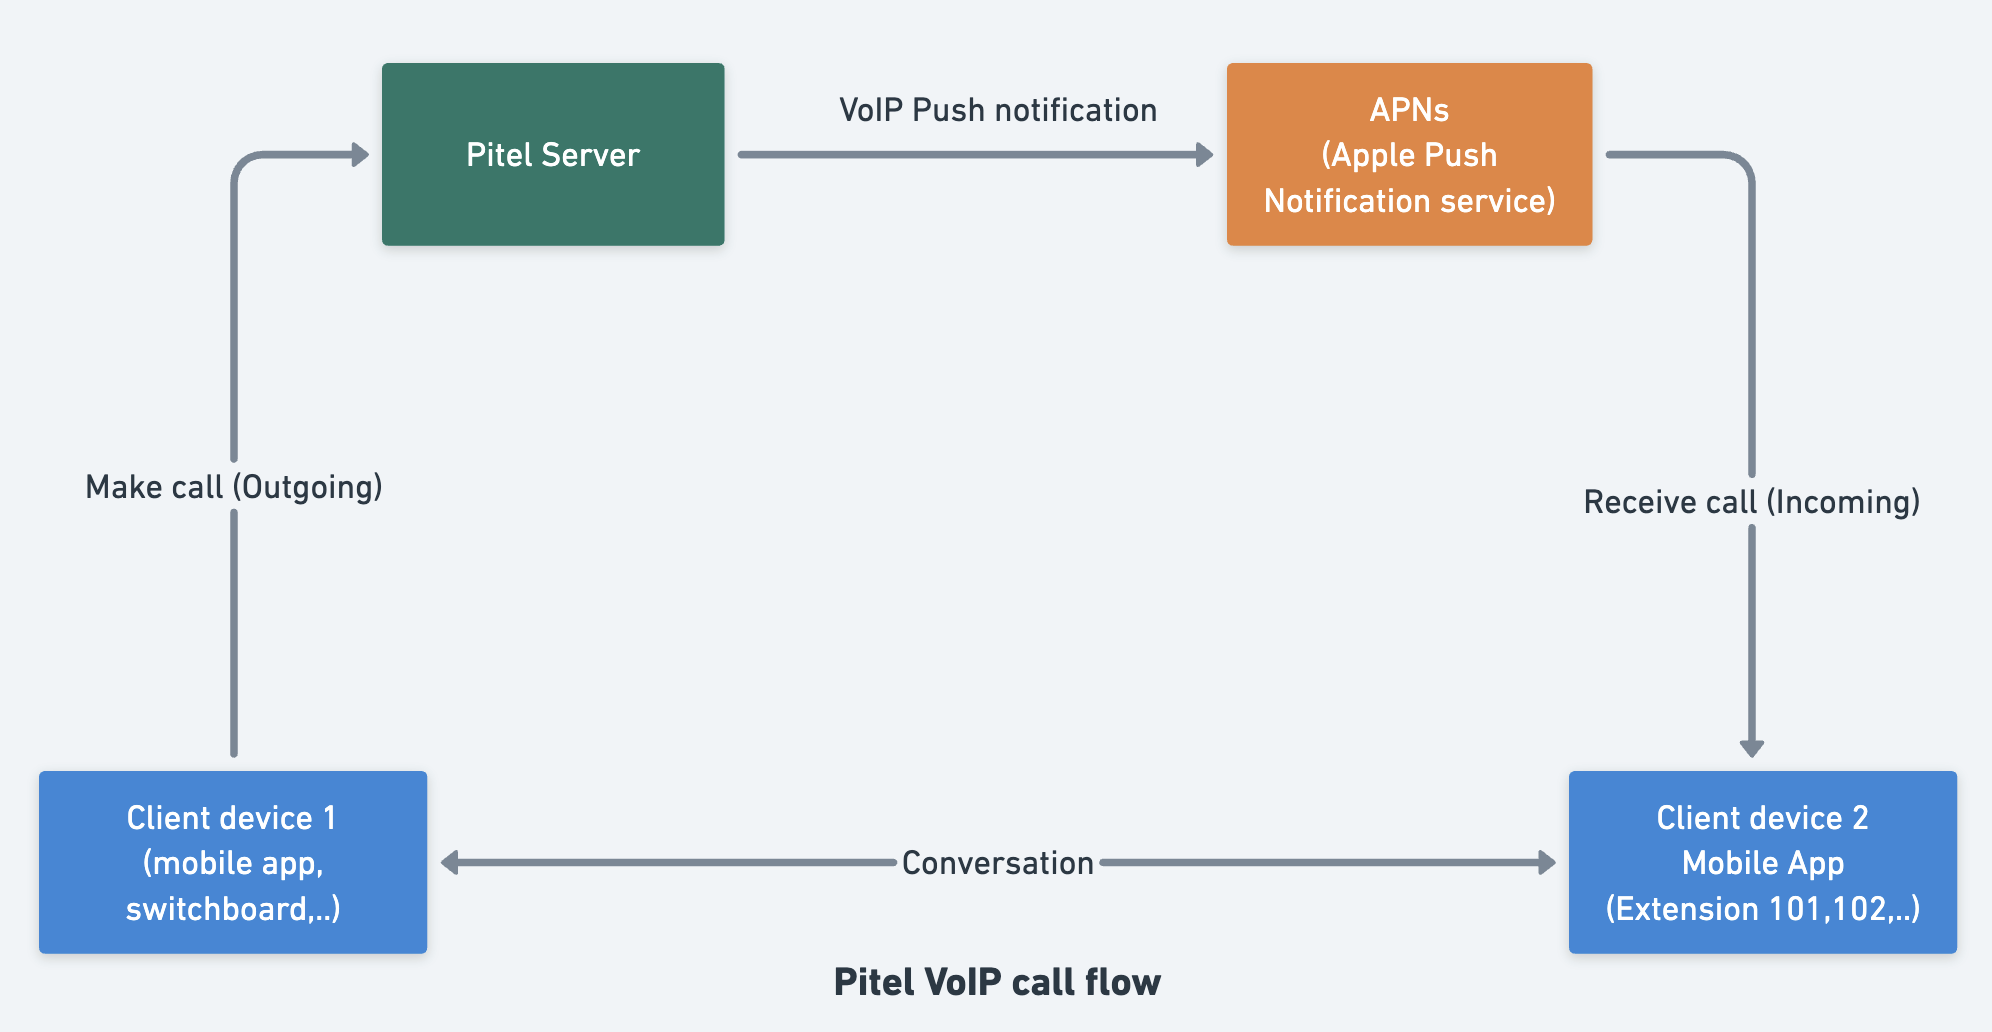
When a user receives a call, Pitel Server sends a push notification to your app. The app then wakes up via CallKit to display the native incoming call UI.
Native Call Experience
| iOS (Alert) | iOS (Lock Screen) | iOS (Full Screen) |
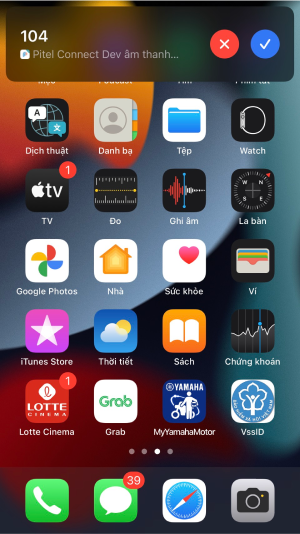 | 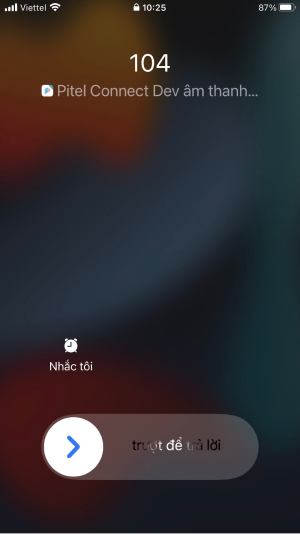 | 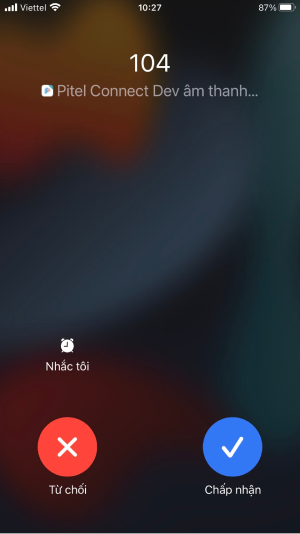 |
🛠 Step-by-Step Guide
📌 Step 1: Apple Developer Configuration
You need to generate two items: a VoIP Services Certificate (for CallKit) and an APNs Key (for Firebase).
1.1 Create VoIP Services Certificate
- Go to Apple Developer Certificates.
- Click (+) to create a new certificate.
- Select VoIP Services Certificate under Services.
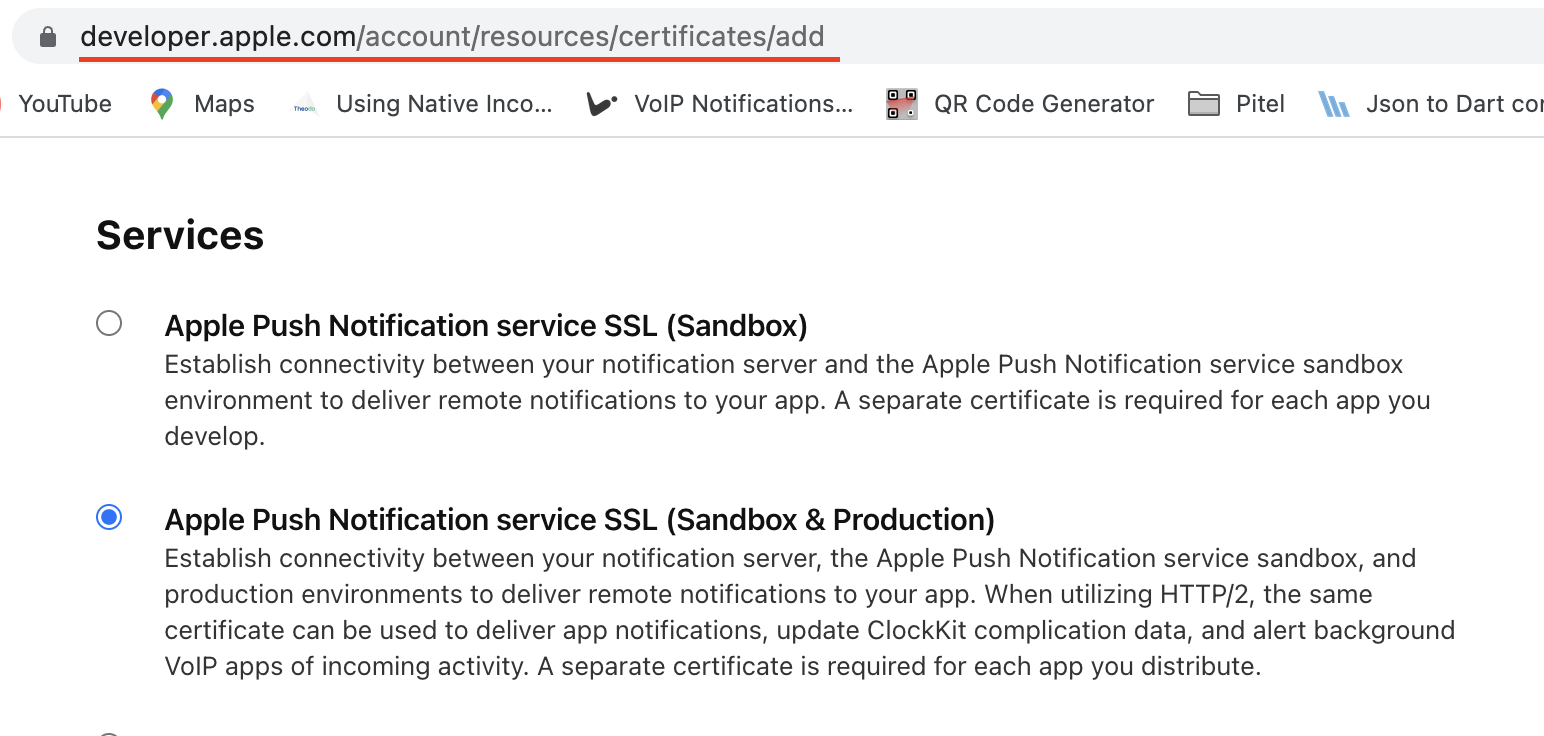
- Choose your App ID and click Continue.
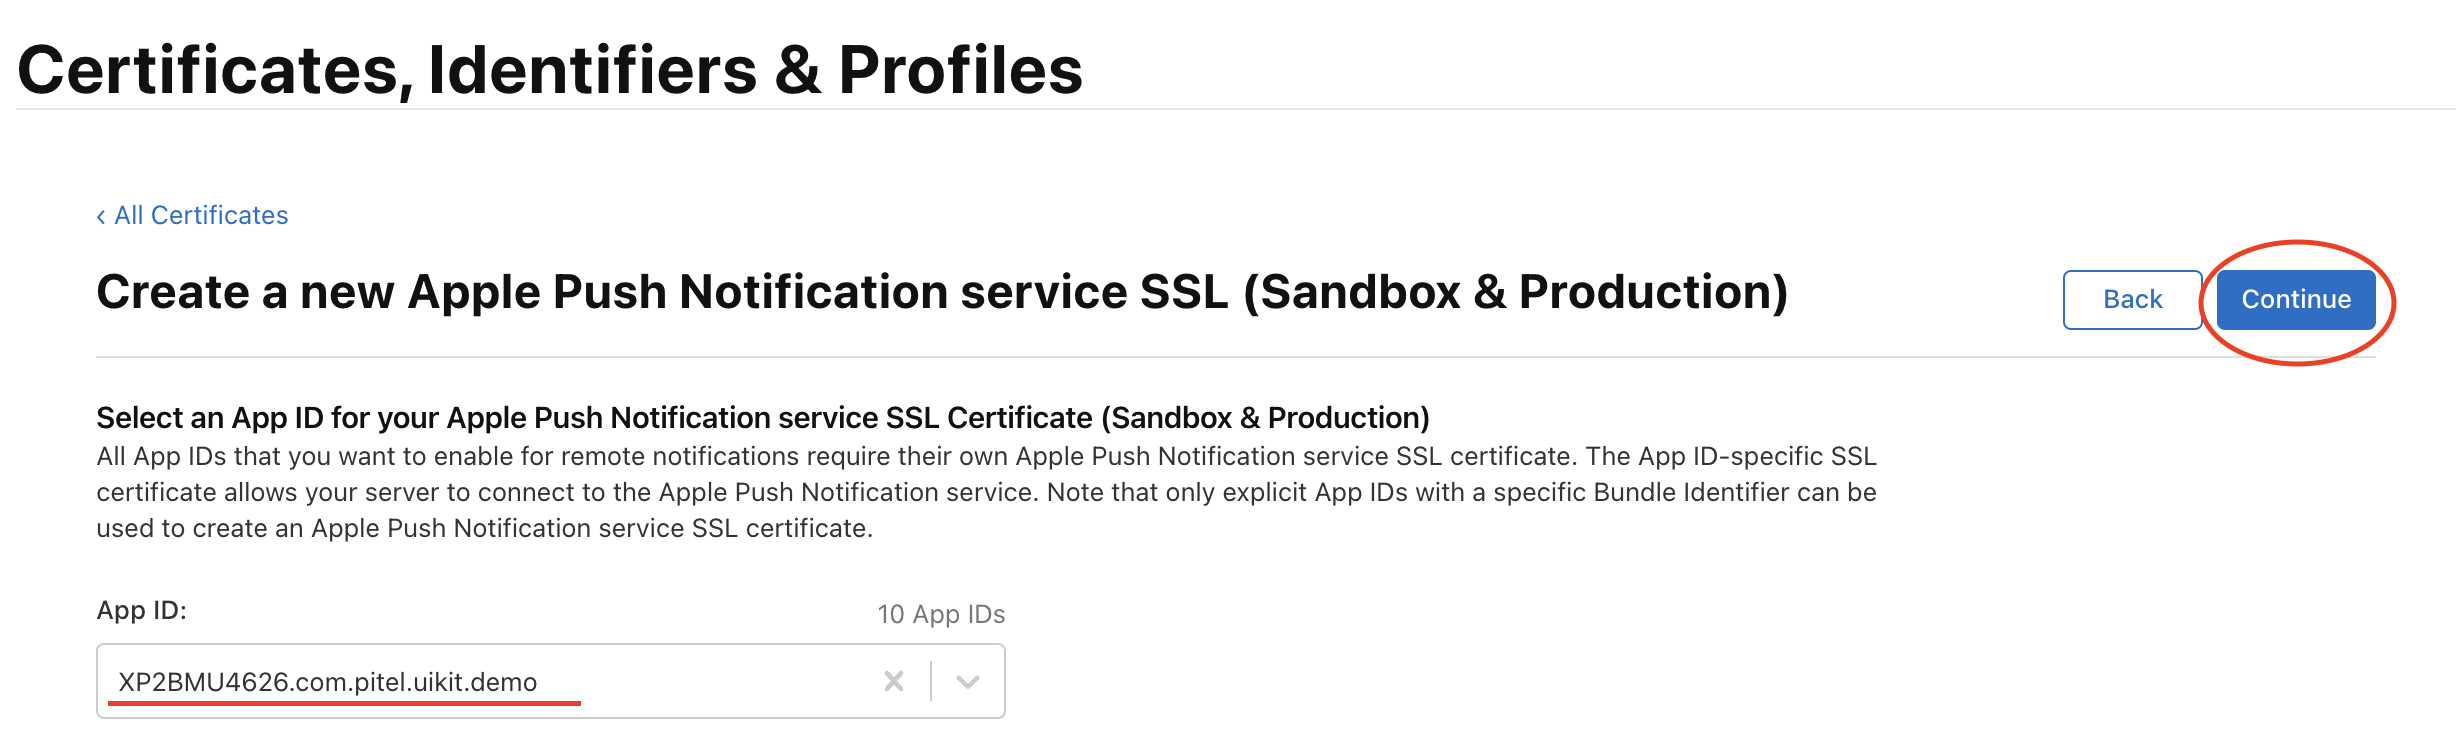
- Upload your Certificate Signing Request (CSR) and Download the
.cerfile.
- Follow the instructions to create a certificate signing request.
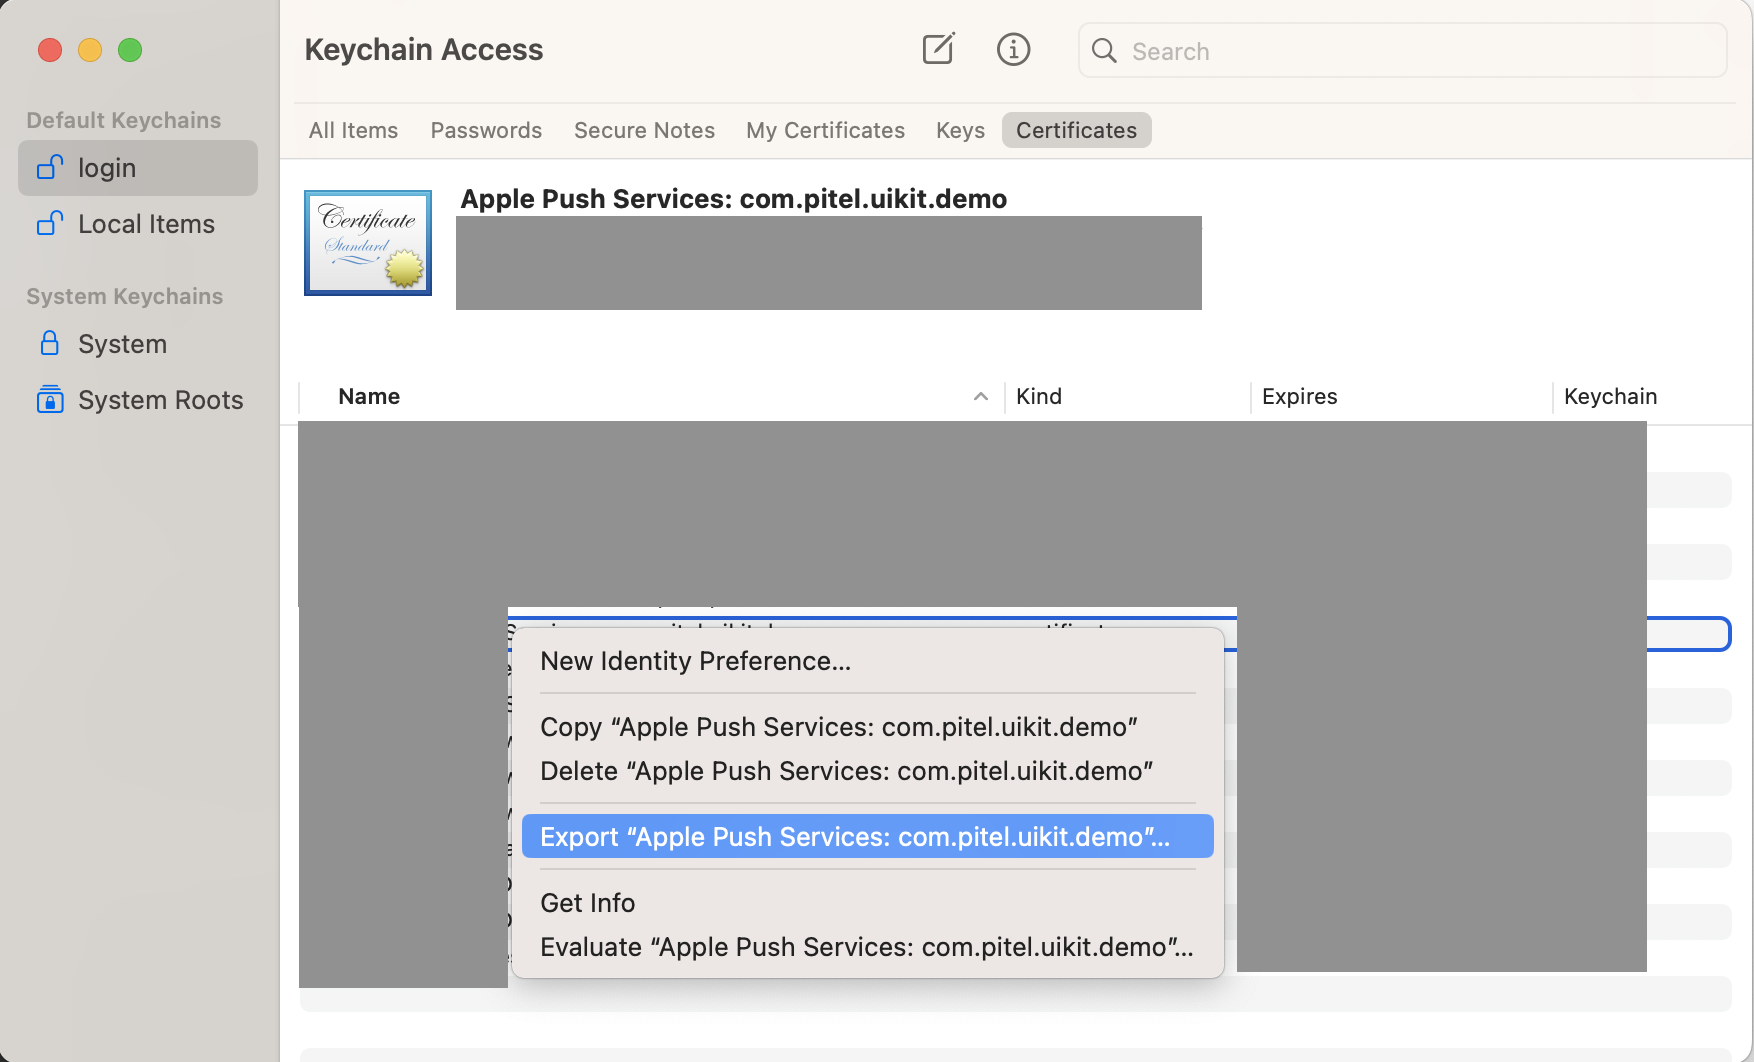
- Double-click the
.cerfile to install it into Keychain Access. - Right-click the certificate in Keychain Access and export it as a .p12 file. (Keep this file for Step 4).
1.2 Create APNs Key (For Firebase)
- Go to Keys in the Apple Developer sidebar.
- Create a new key and enable Apple Push Notifications service (APNs).
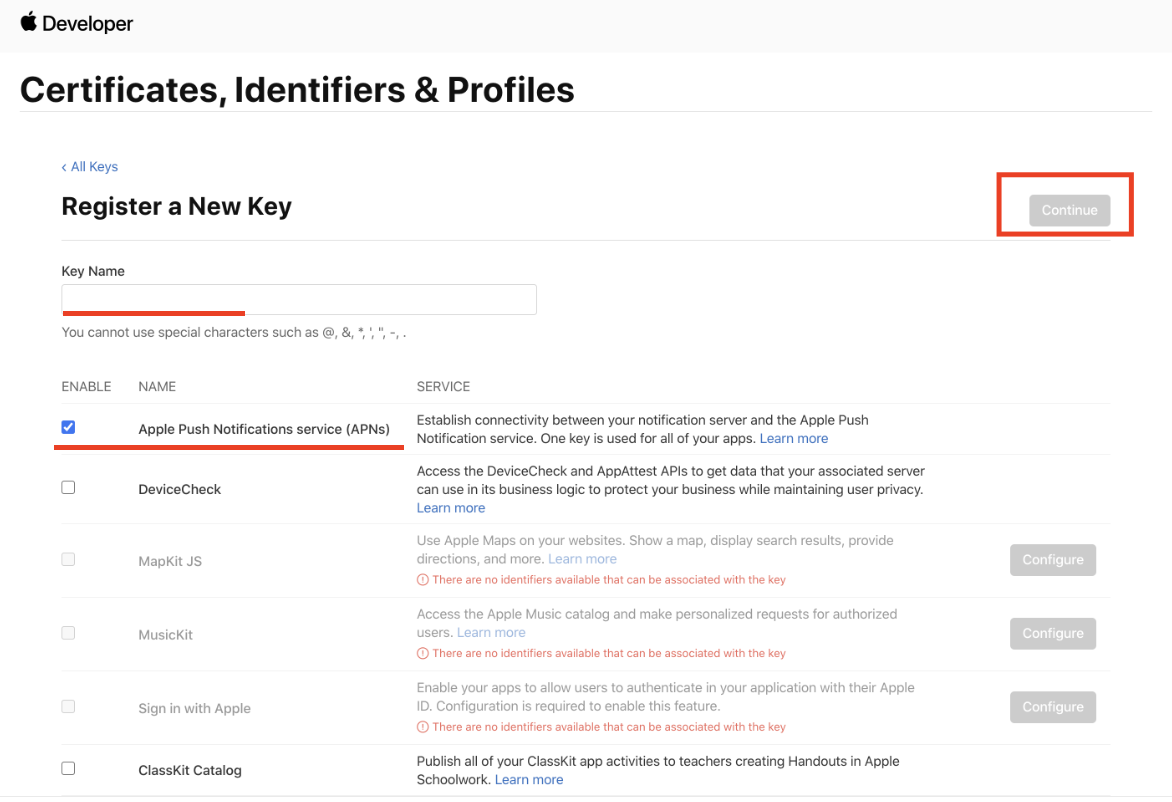
- Download the
.p8file. (Keep this file for Step 3).
📌 Step 2: Xcode Project Configuration
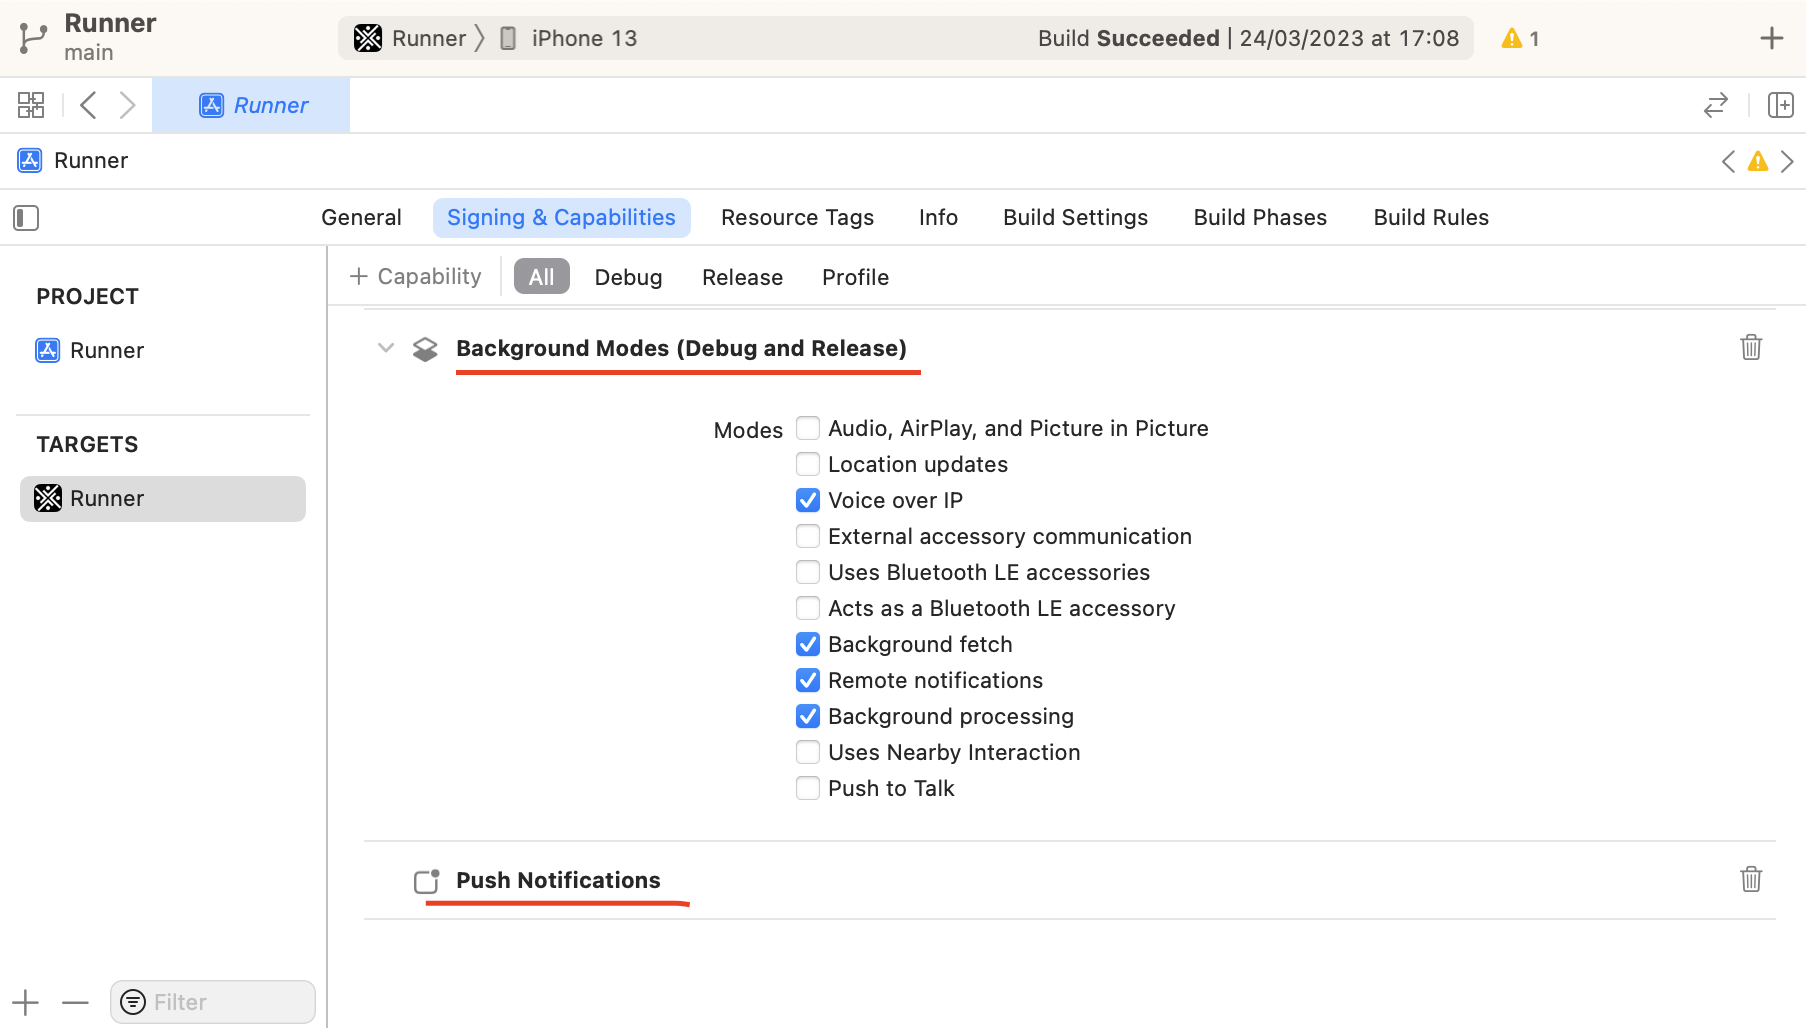
2.1 Enable Capabilities
Open your project in Xcode → Signing & Capabilities:
-
Add Push Notifications.
-
Add Background Modes and check the following:
- ✅ Voice over IP
- ✅ Background fetch
- ✅ Remote notifications
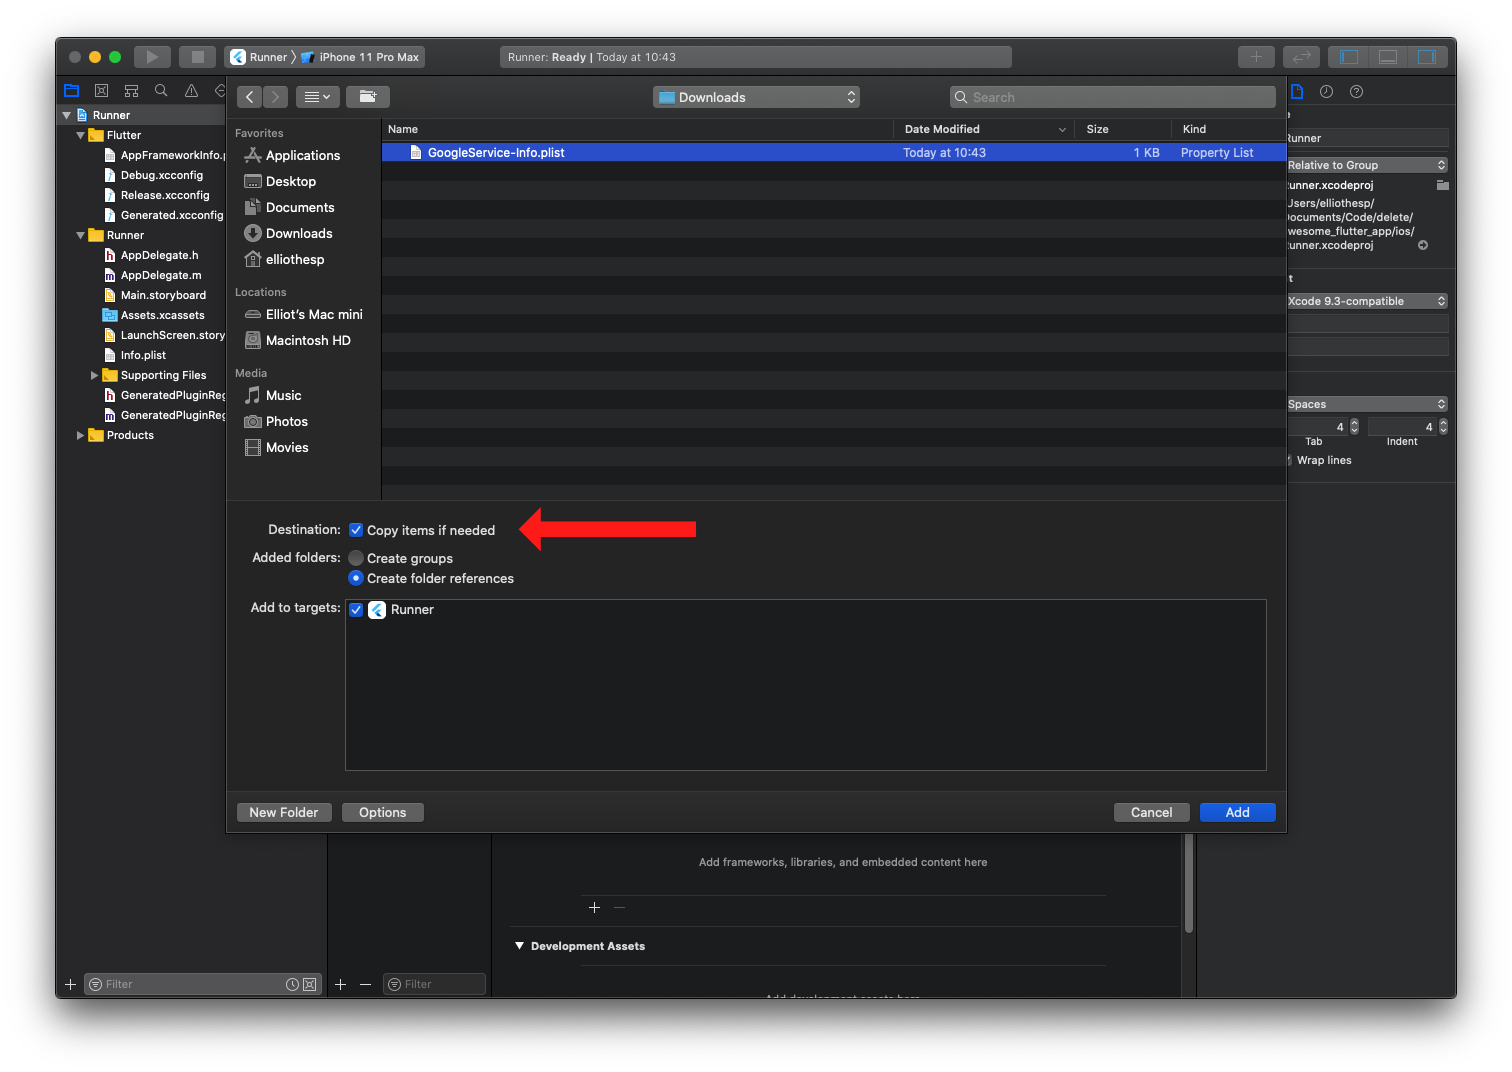
2.2 Add Firebase Configuration
-
Download
GoogleService-Info.plistfrom your Firebase Console. -
Drag and drop it into your Xcode project root.
-
Important: Ensure "Copy items if needed" is checked.
📌 Step 3: Firebase & Server Configuration
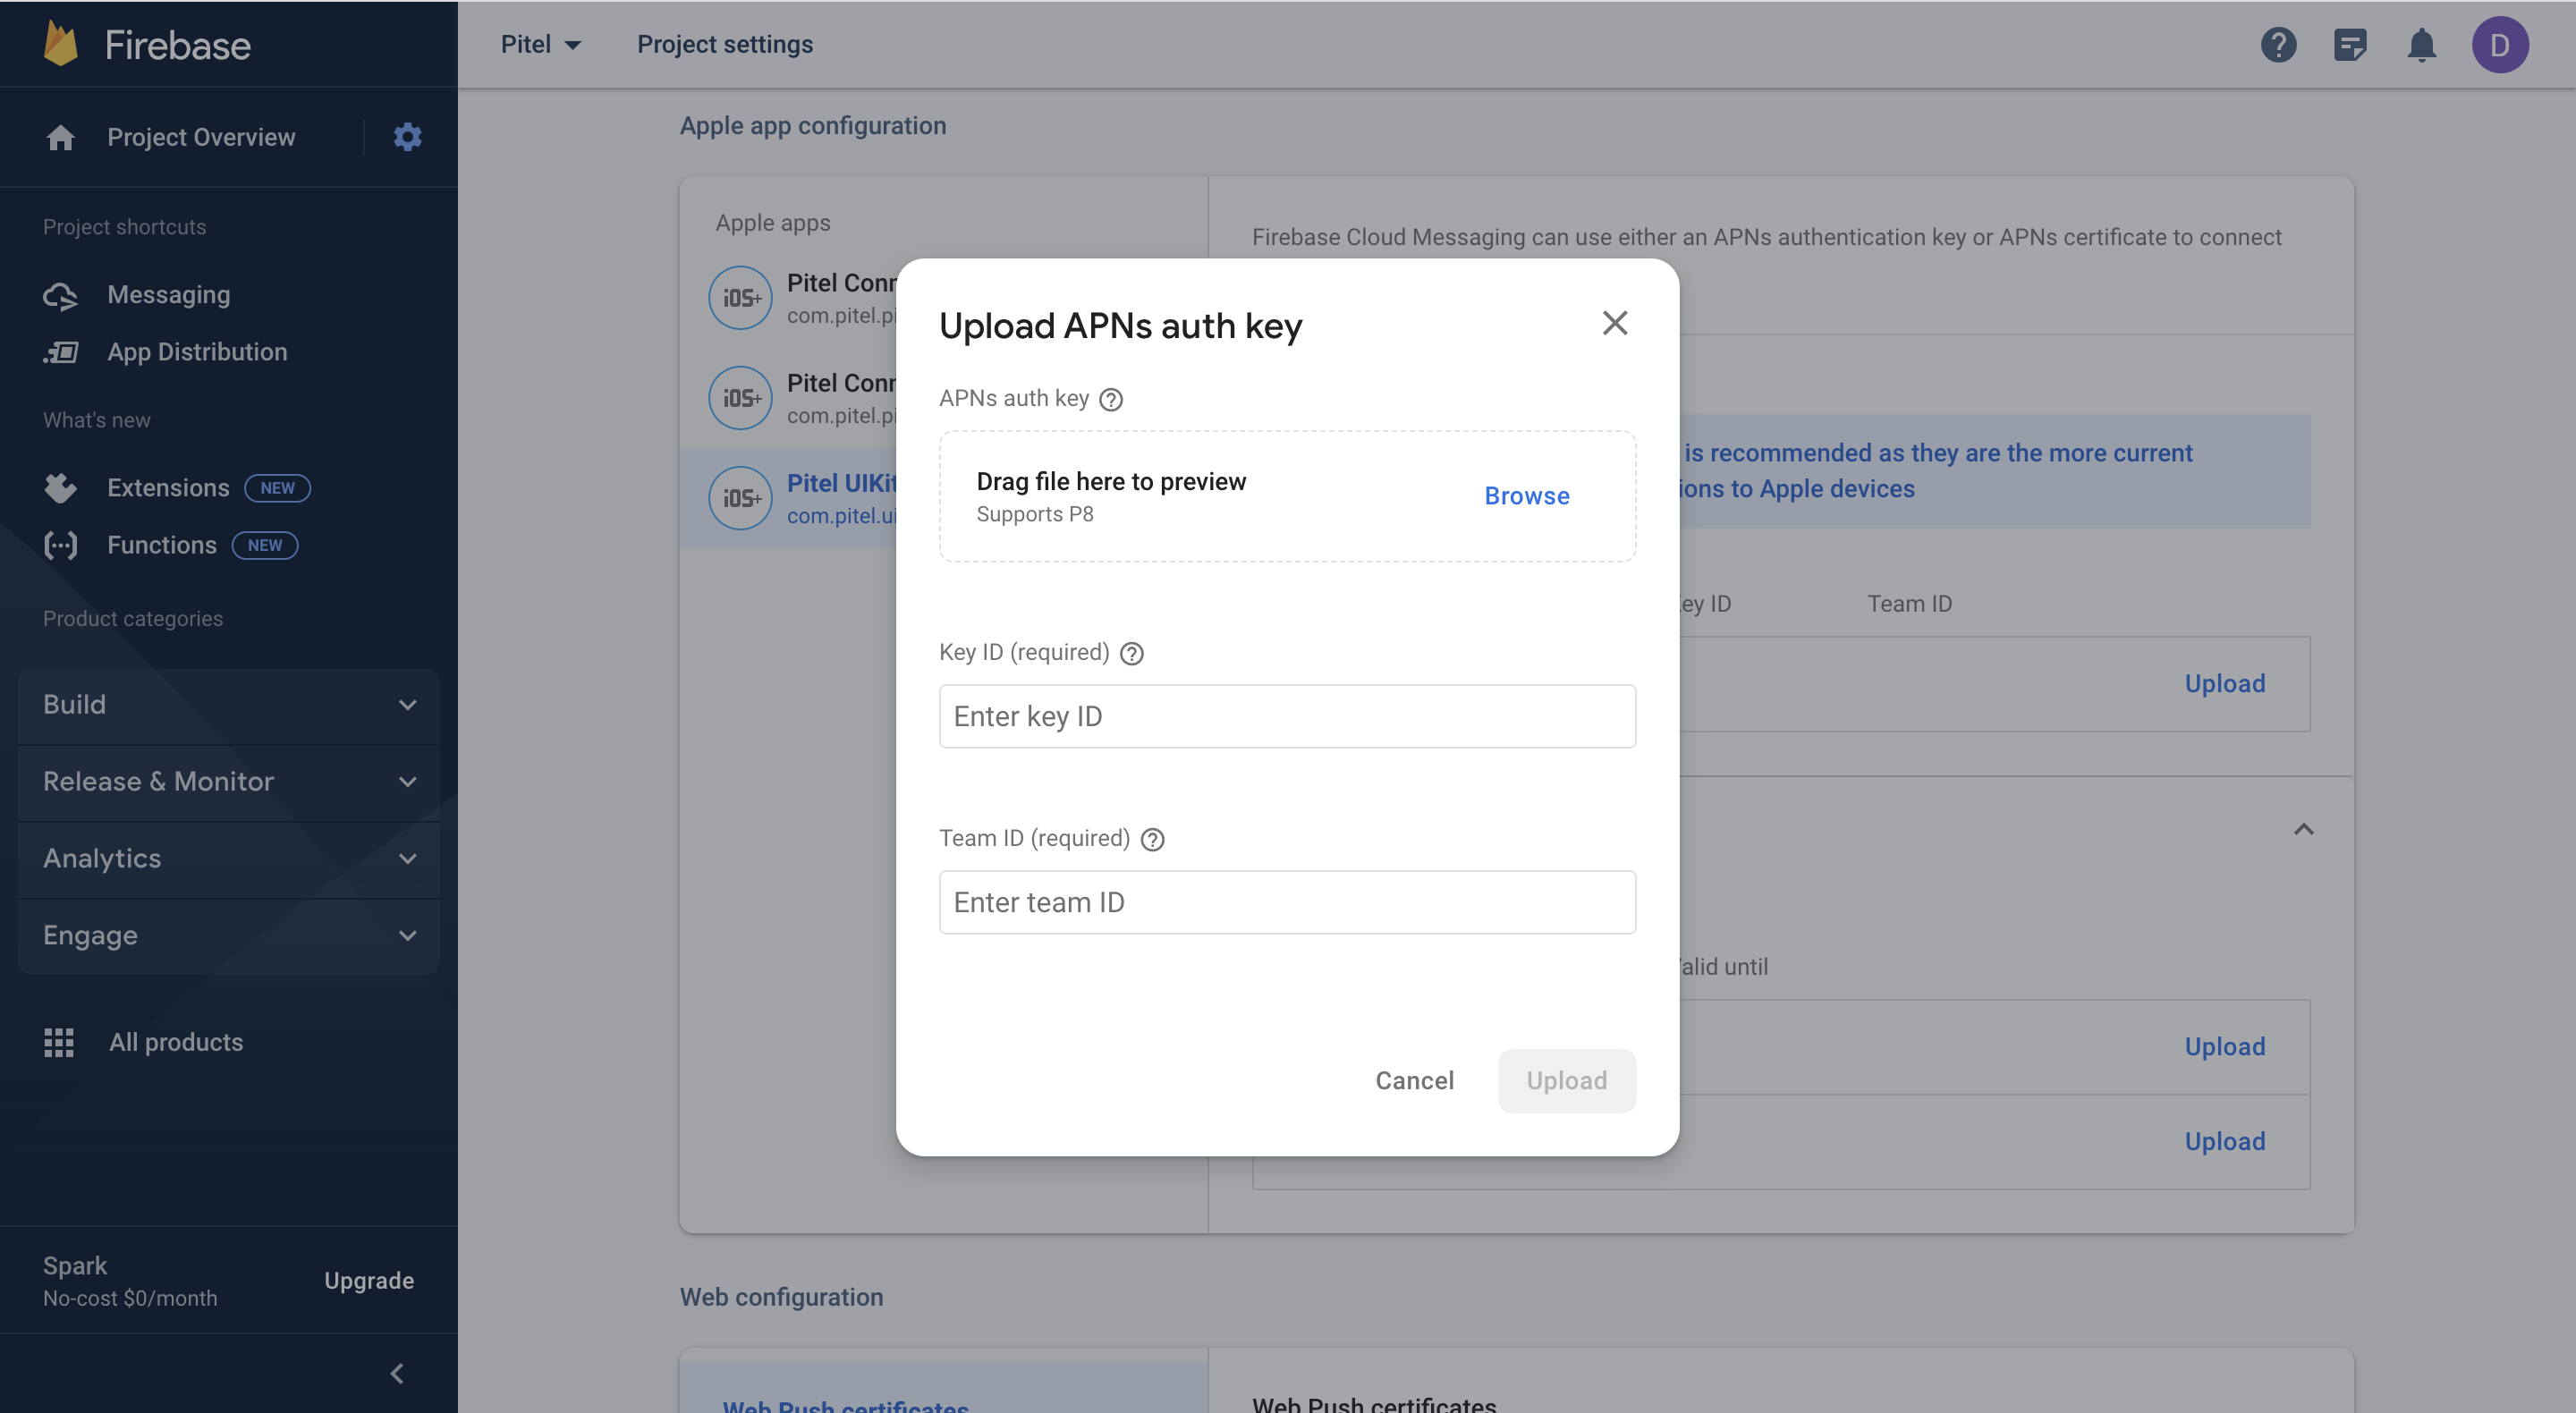
3.1 Upload APNs Key to Firebase
- Go to Firebase Console → Project Settings → Cloud Messaging.
- Under Apple app configuration, locate your iOS app.
- Upload the
.p8APNs Key (from Step 1.2). - Enter your Key ID and Team ID.
3.2 Generate Service Account
Pitel Server uses this to send push notifications on your behalf.
- In Firebase Console, go to Project Settings → Service Accounts.
- Click Generate new private key.
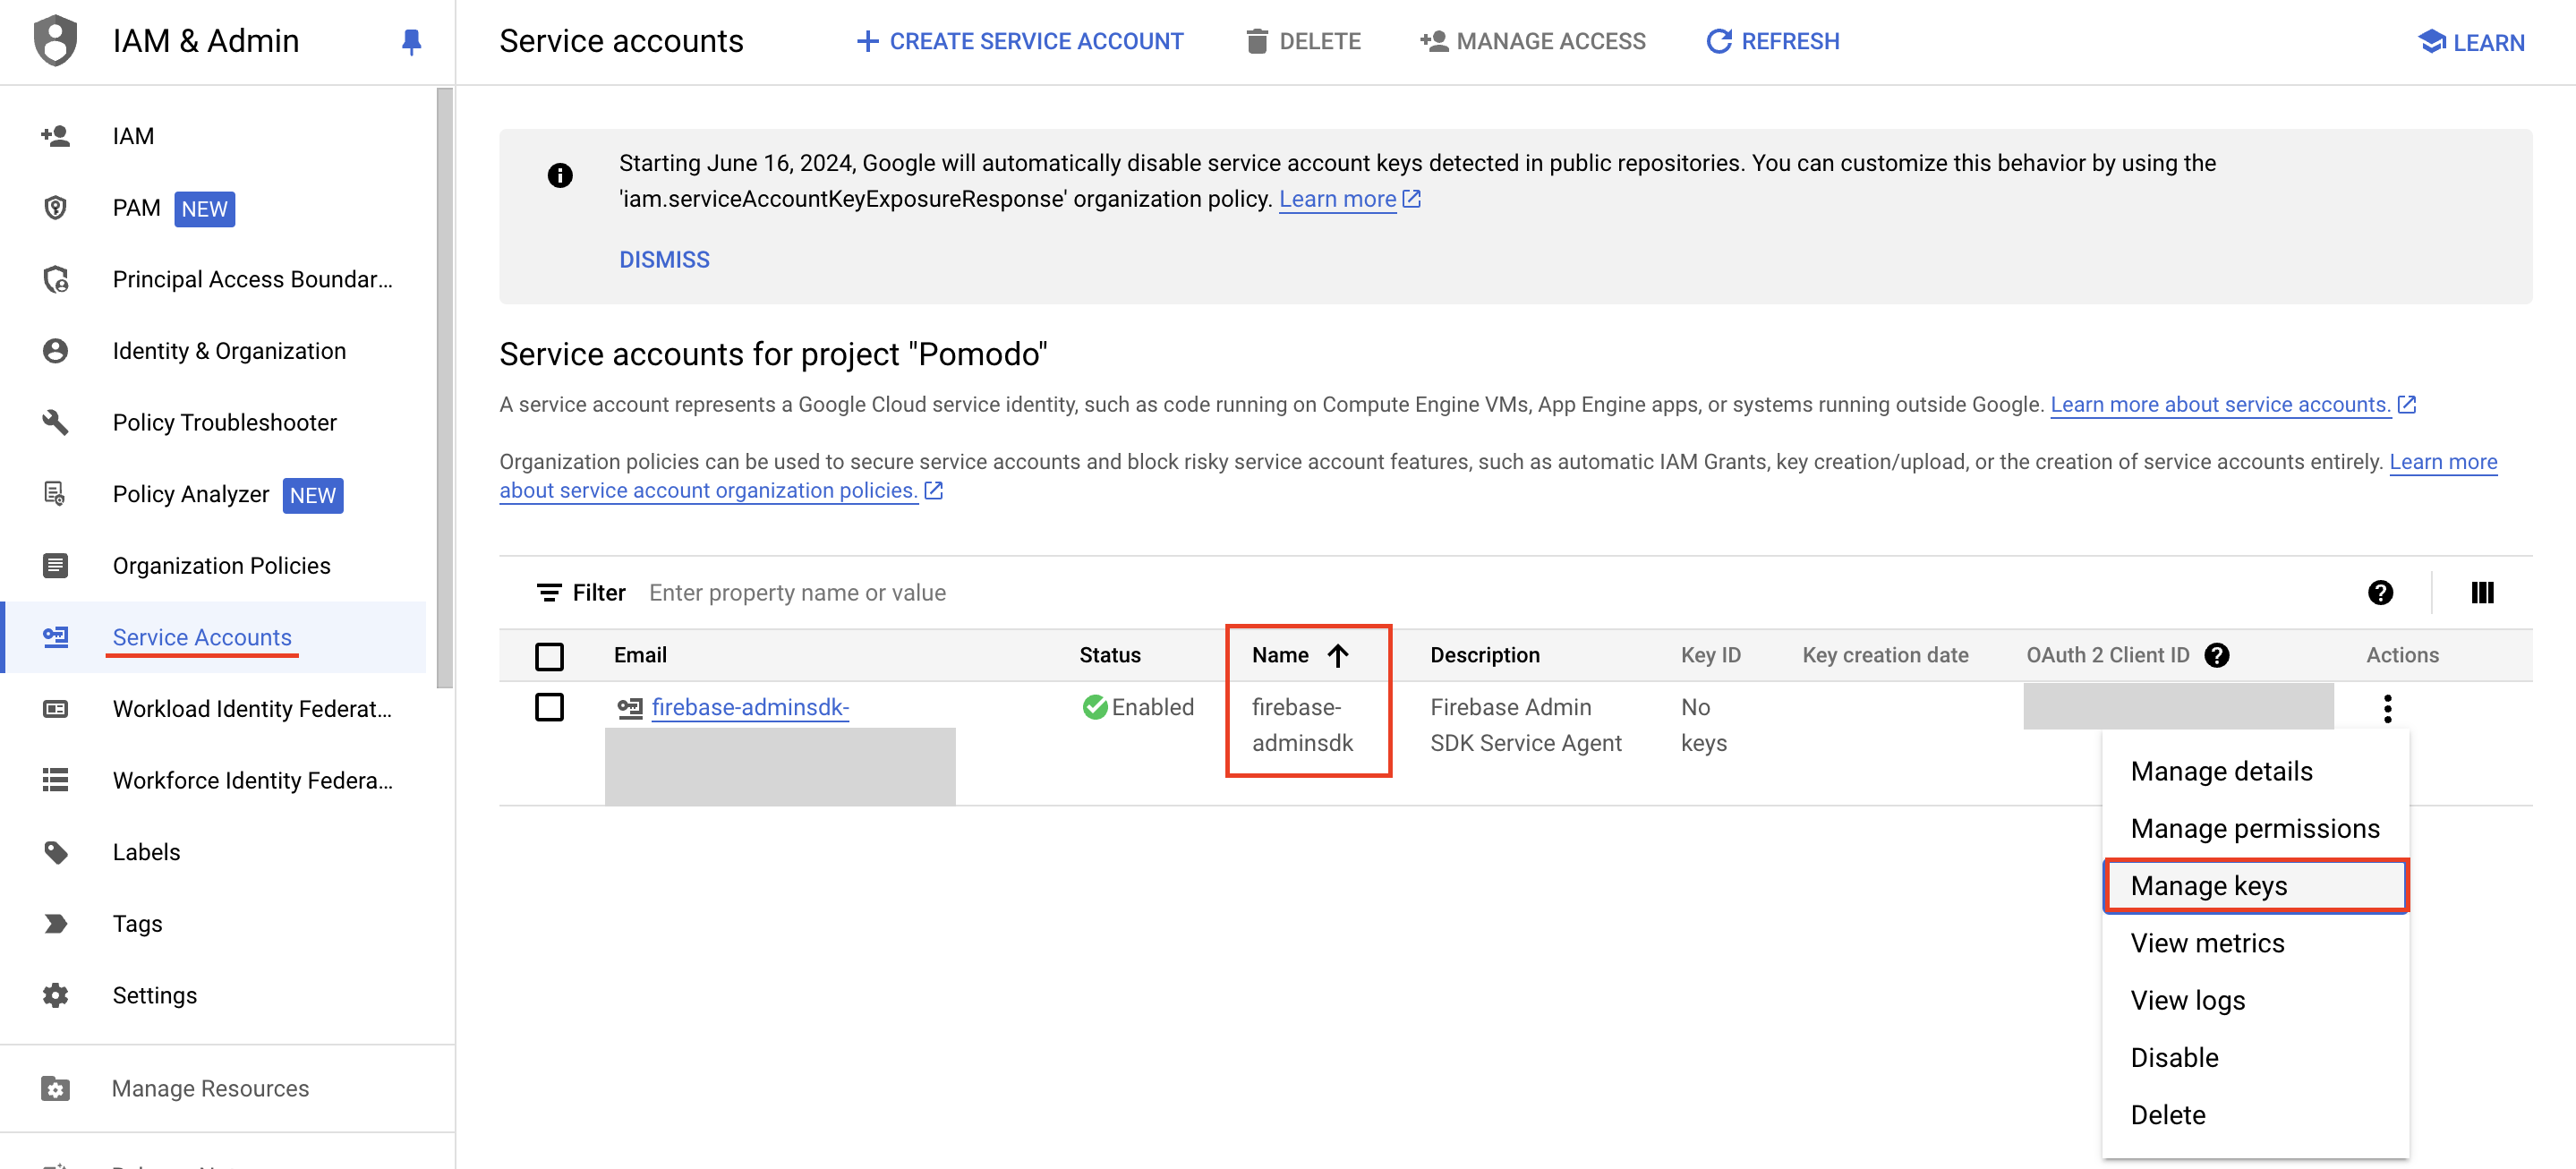
- A
.jsonfile will be downloaded. (Keep this file for Step 4).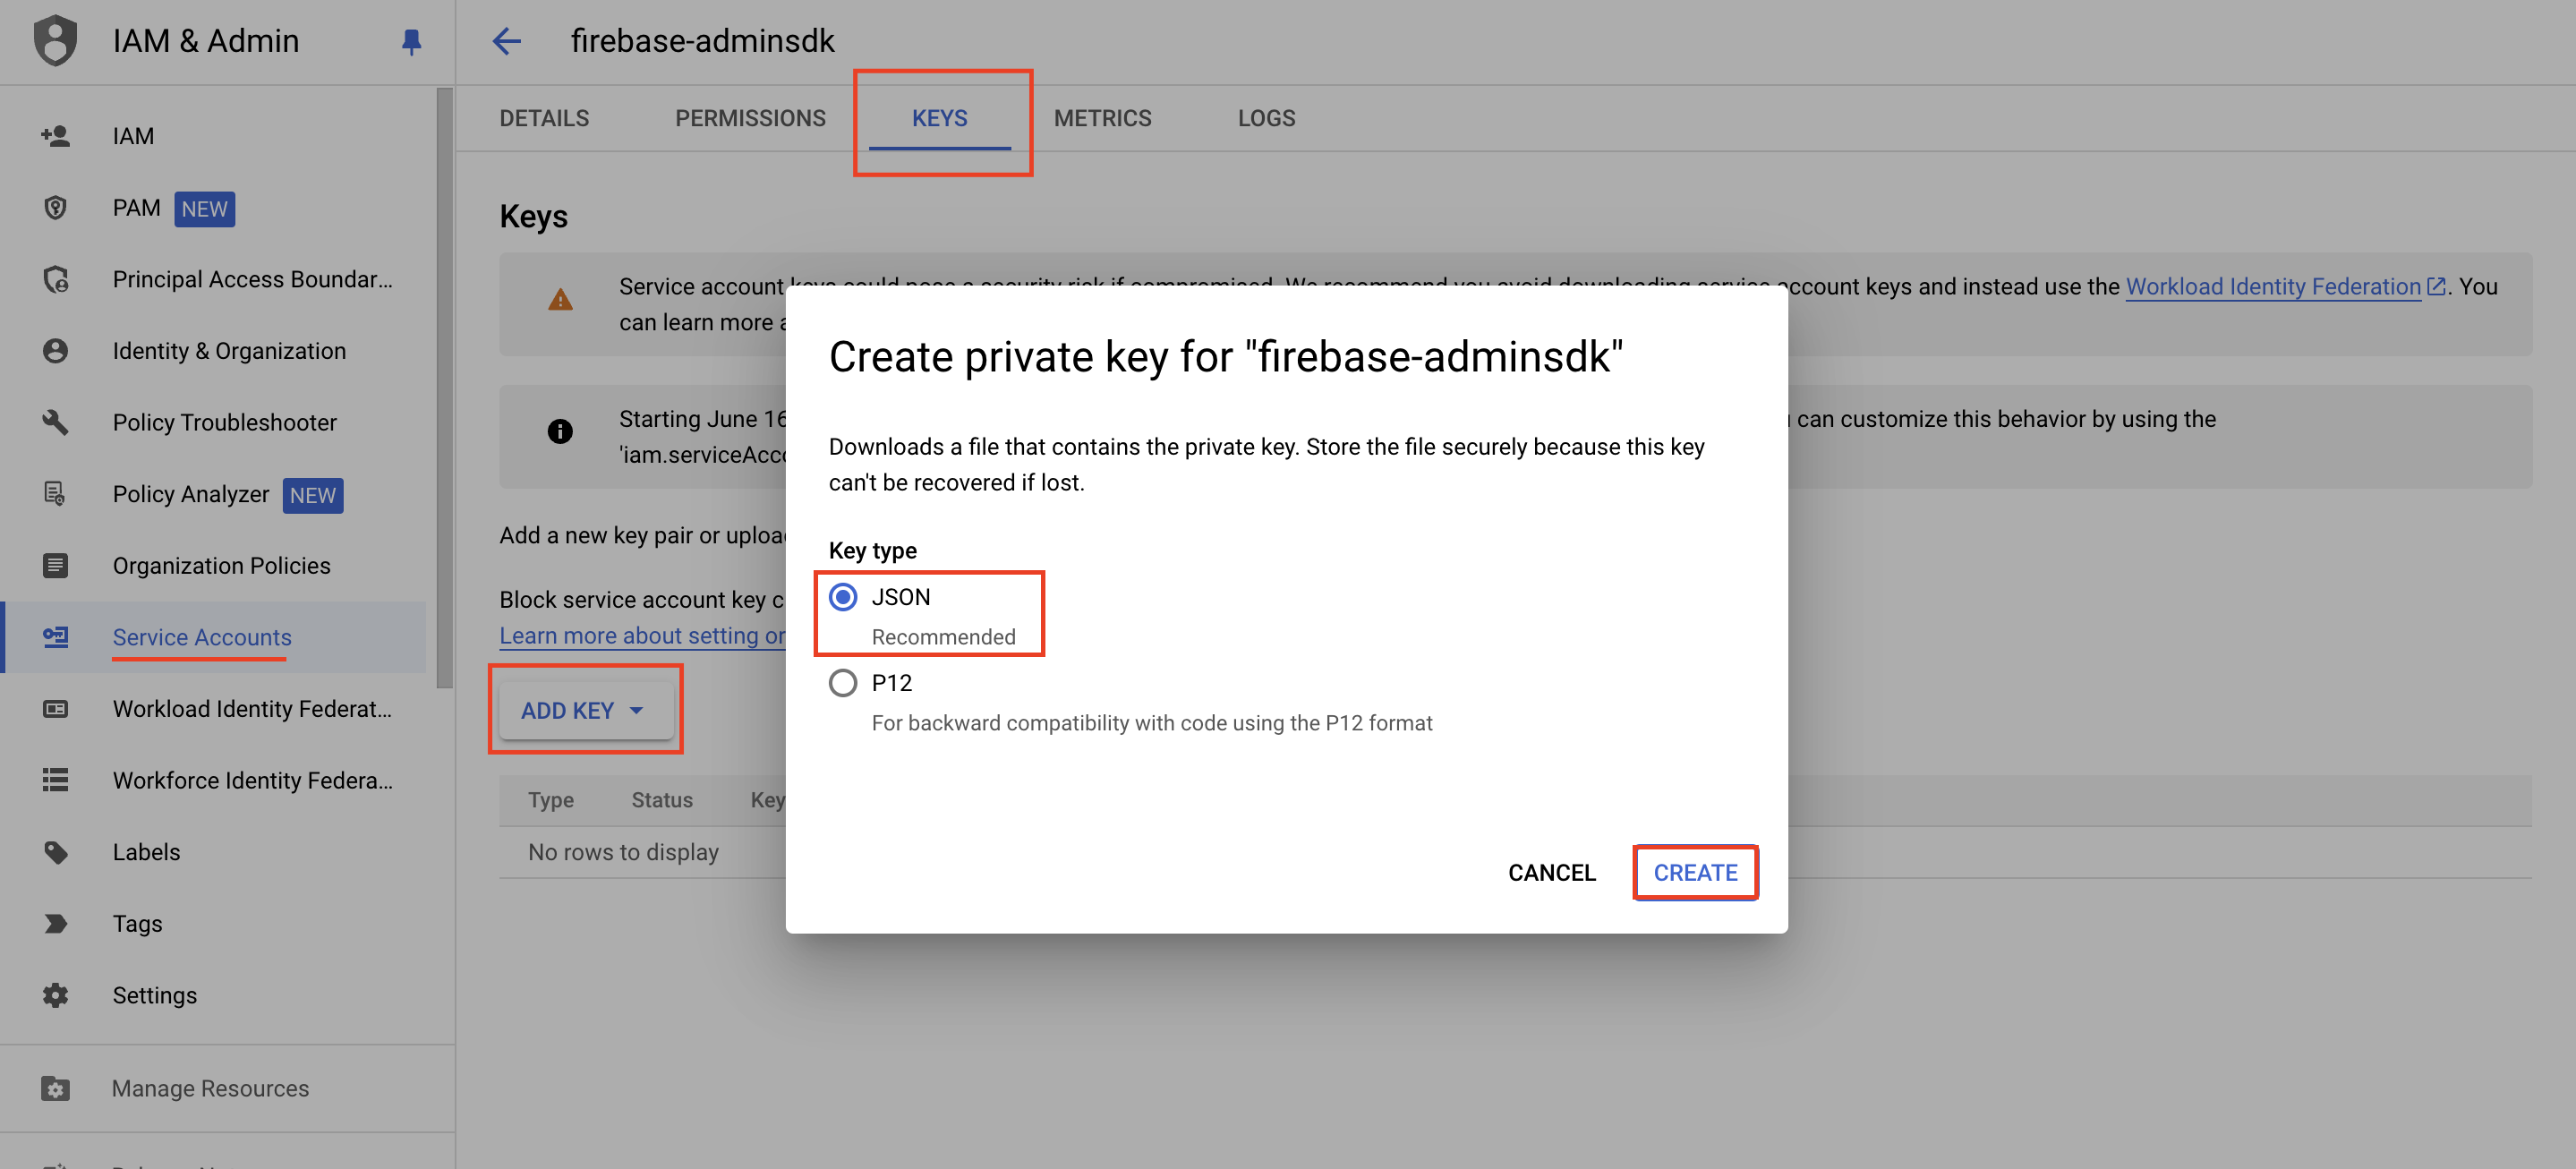
🚀 Step 4: Update Pitel Portal
Finally, upload the necessary credentials to the Pitel Portal to activate VoIP services.
- Upload
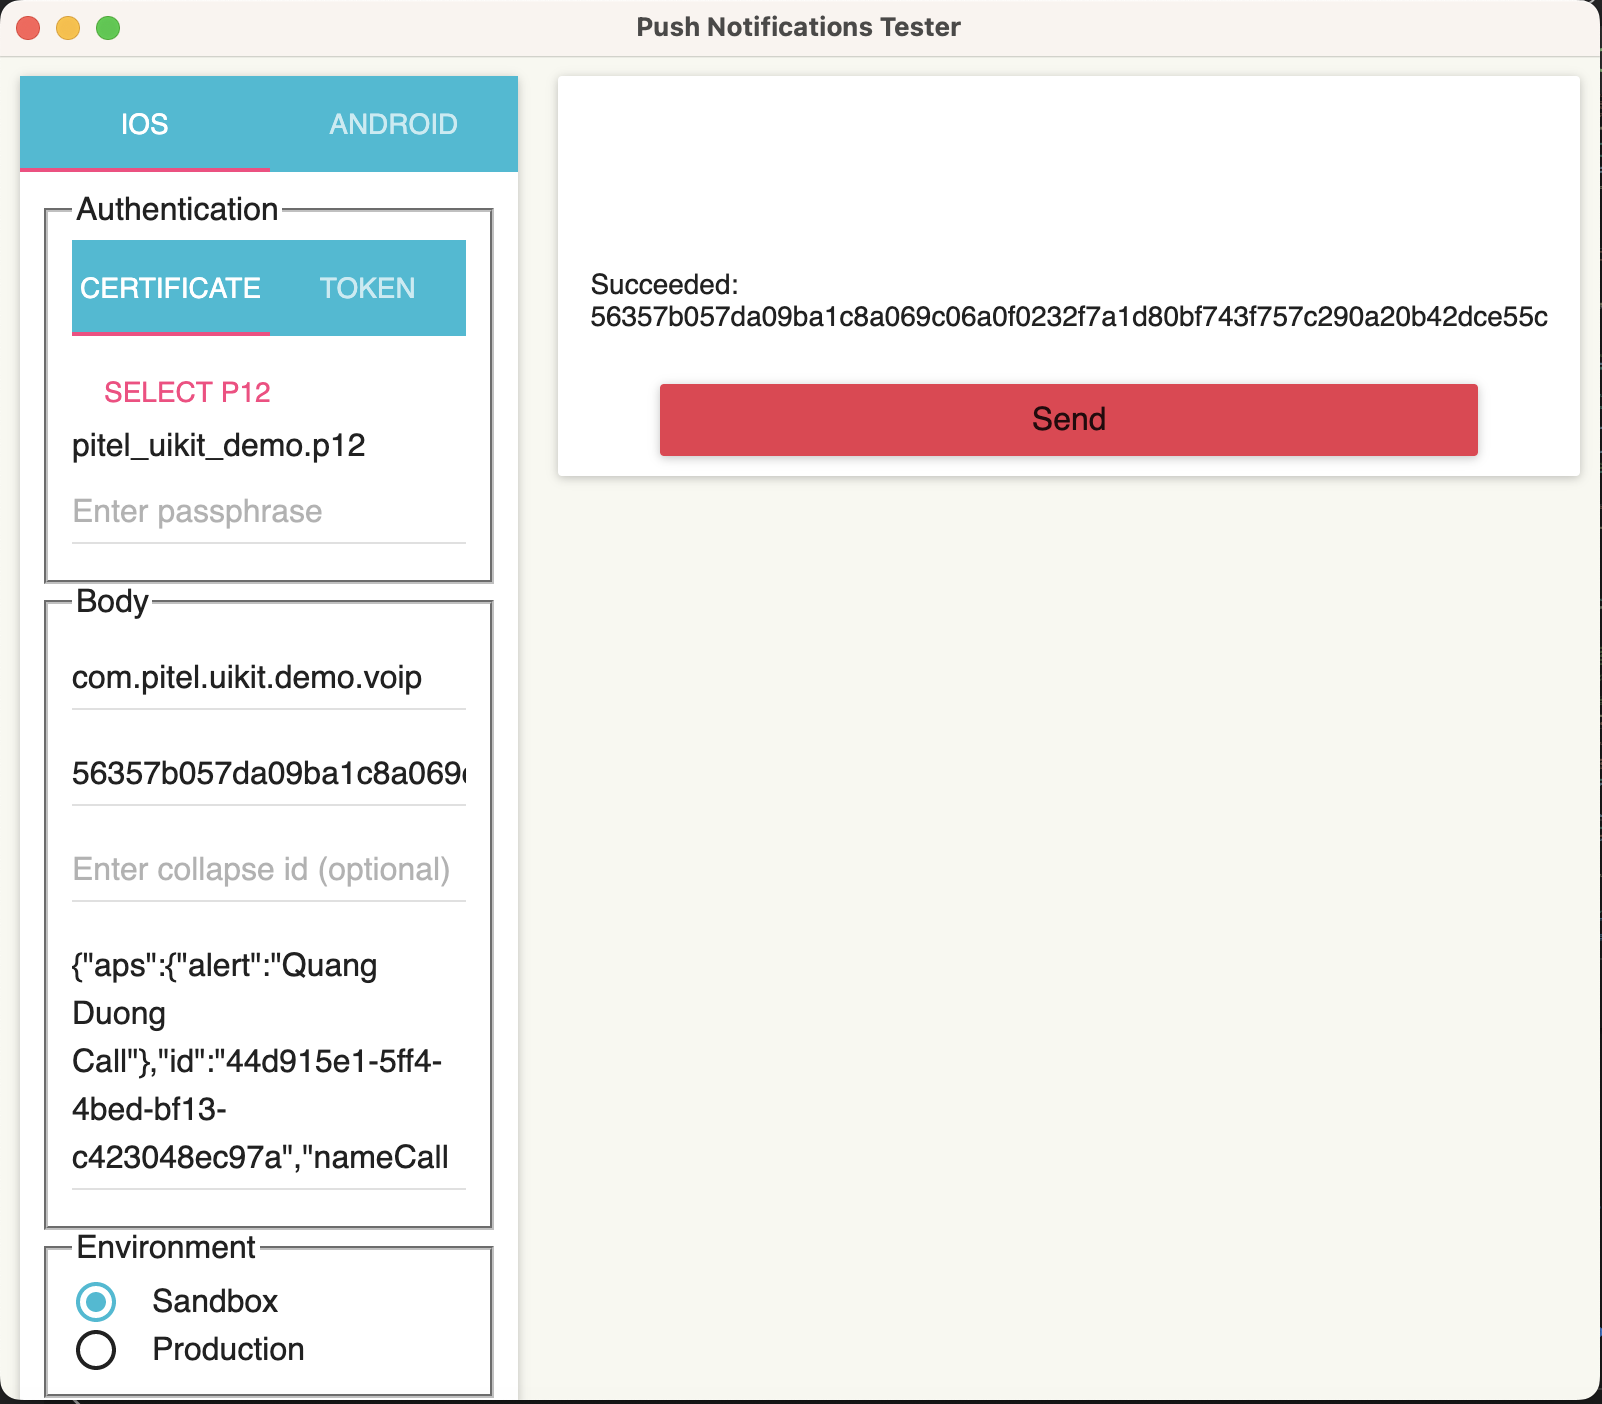
.p12File: The VoIP Certificate from Step 1.1. - Upload
.jsonFile: The Service Account file from Step 3.2.
Note: Ensure you have configured your app on the portal as described in the Portal Guide.
✅ Testing
Run the app on a Real Device (iPhone) to test receiving calls in the background and locked state.