Pitel Voip Push notification
Warning
- IOS only working on real device, not on simulator (Callkit framework not working on simulator)
- Please renew voip push notification certificate (iOS) once a year on Apple Developer and upload the certificate file to the portal sdk.
Pitel Connect Flow
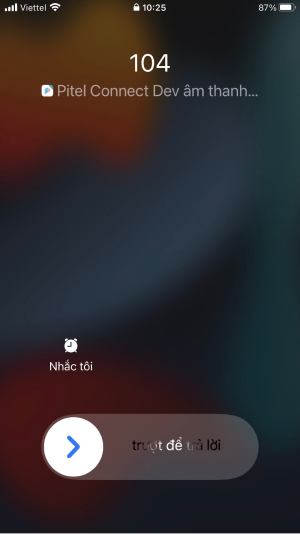
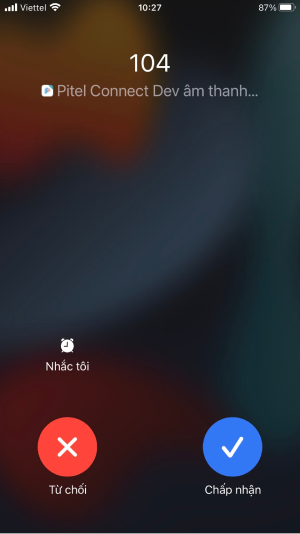
When user make call from Pitel Connect app, Pitel Server pushes a notification for all user login (who receives the call). When user "Accept" call, extension will re-register to receive call.
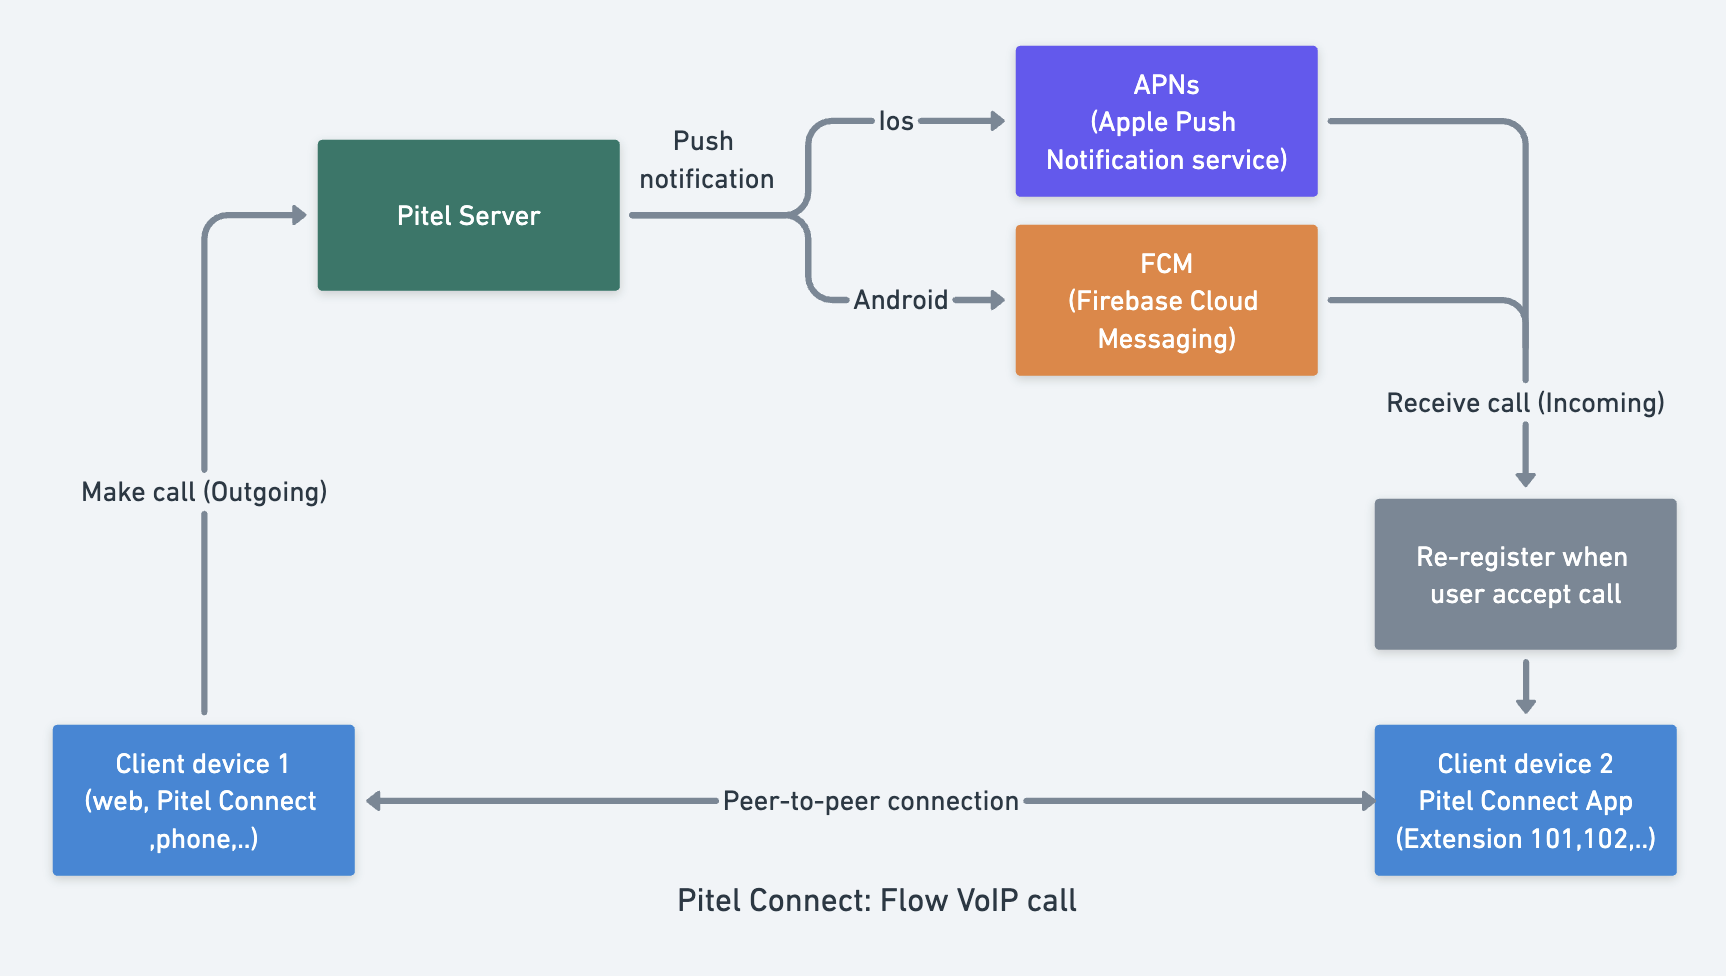
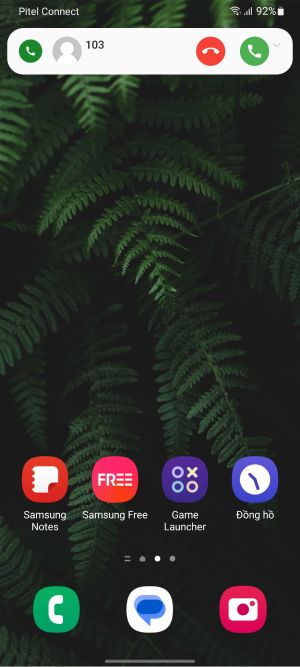
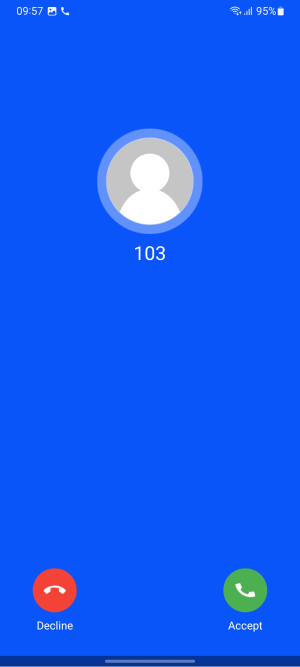
Image callkit
Setup & Certificate
IOS
If you are making VoIP application than you definitely want to update your application in the background & terminate state as well as wake your application when any VoIP call is being received.
1. Create Apple Push Notification certificate.
- Access https://developer.apple.com/account/resources/identifiers/list
- In Certificates, Identifiers & Profiles, click Certificates in the sidebar.
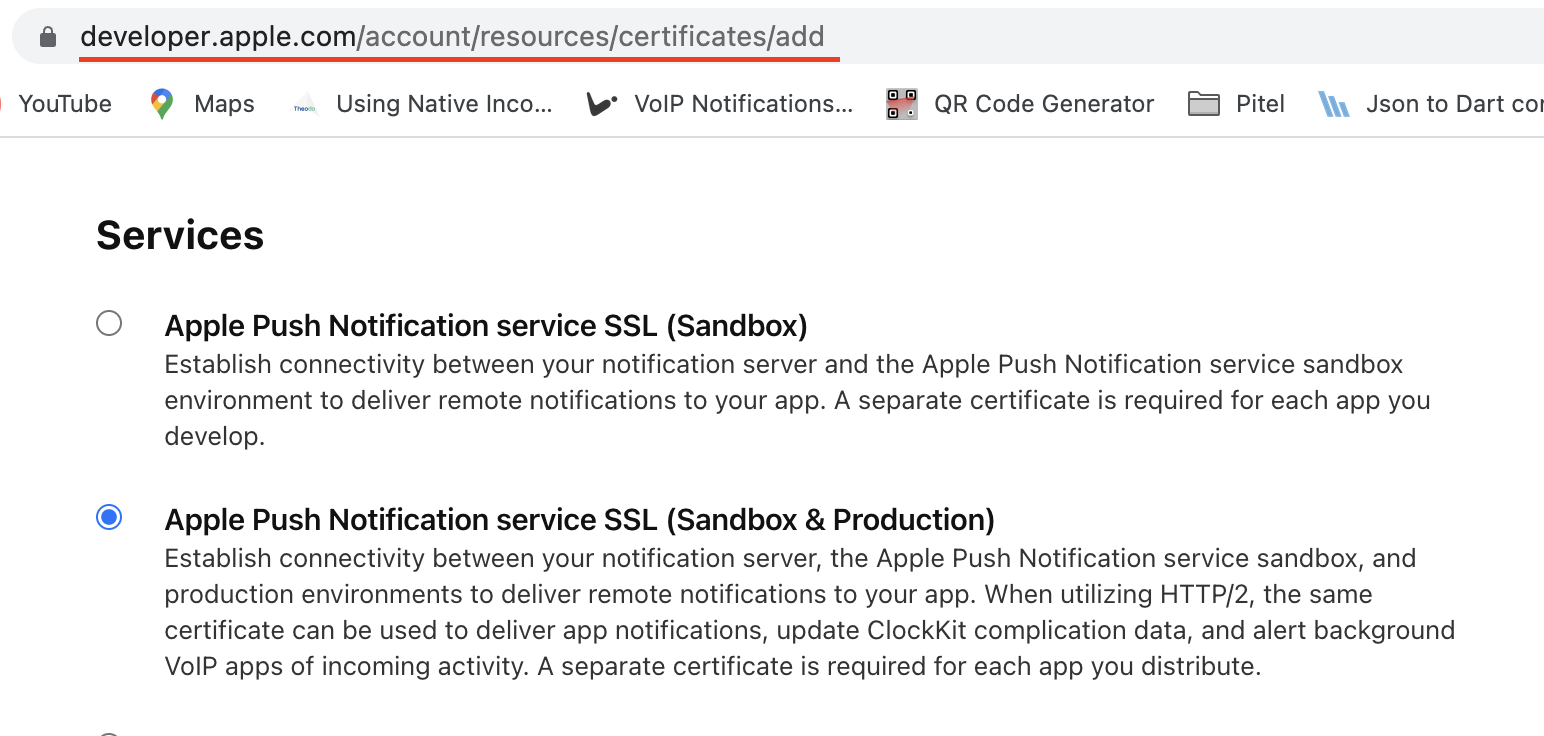
- On the top left, click the add button (+).The certificate type should be Apple Push Notification service SSL (Sandbox & Production) under Services.
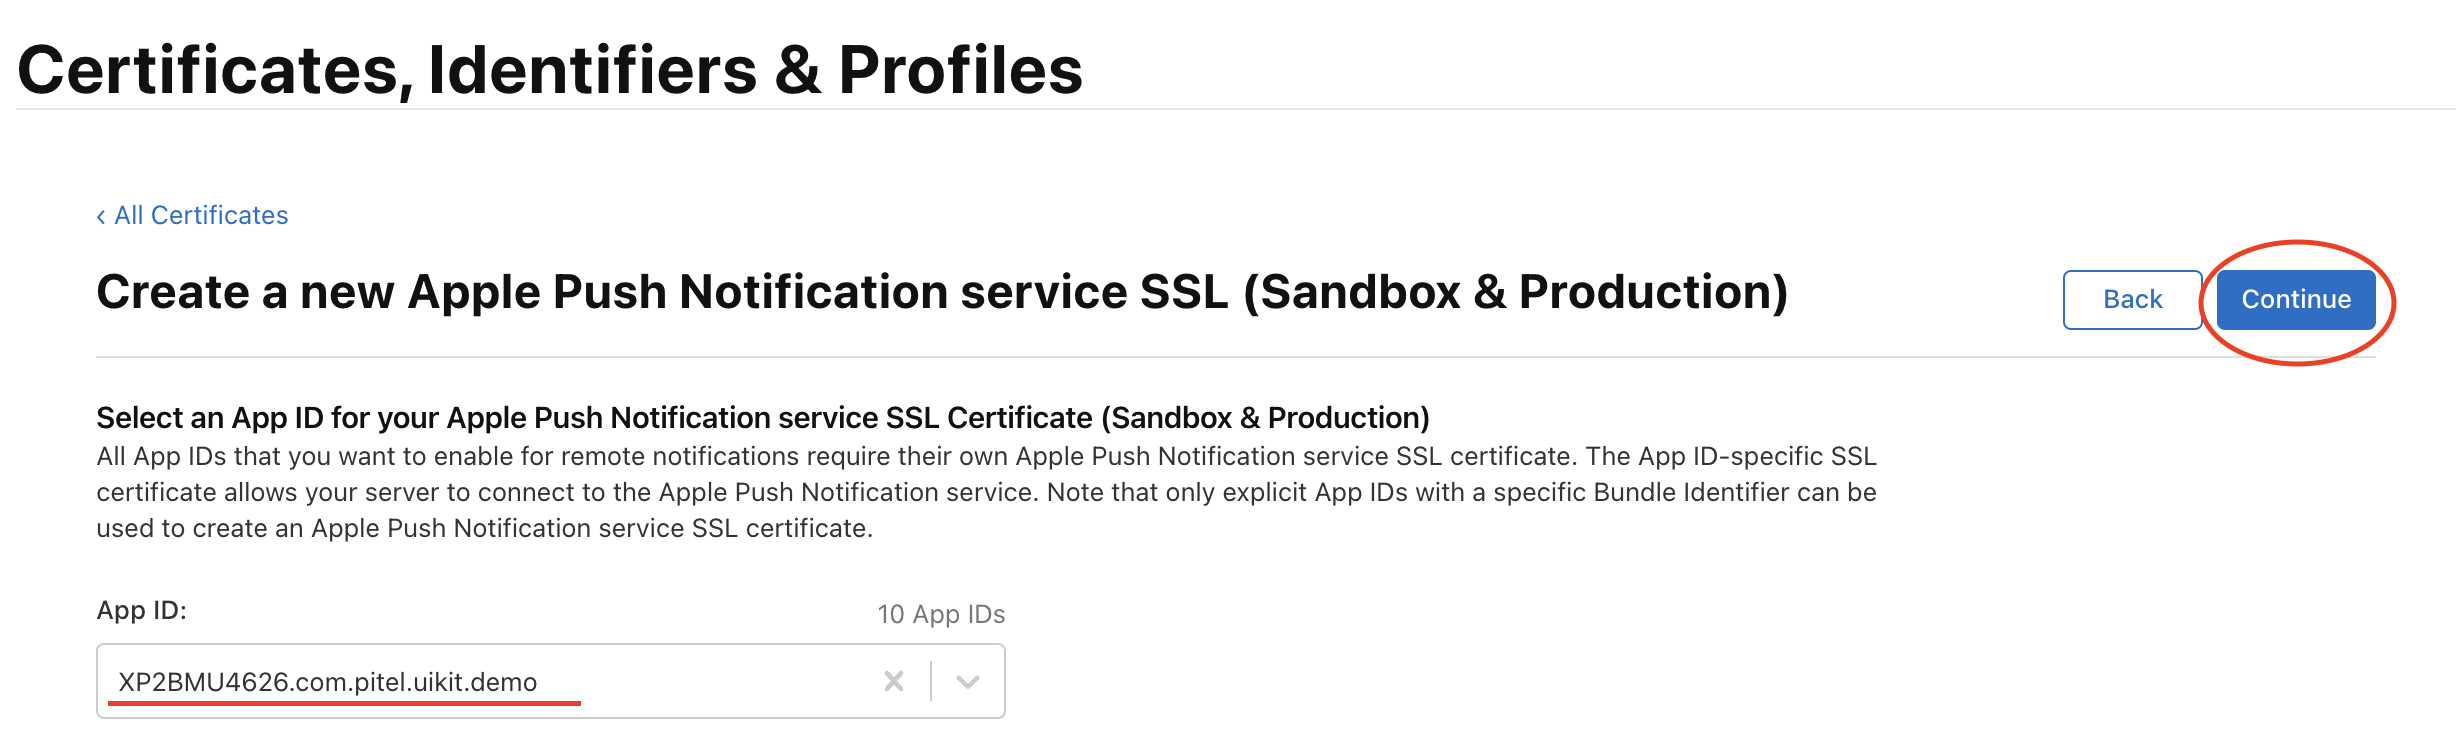
2. Choose an App ID from the pop-up menu, then click Continue.
3. Upload Certificate Signing Request → Continue

Follow the instructions to create a certificate signing request.
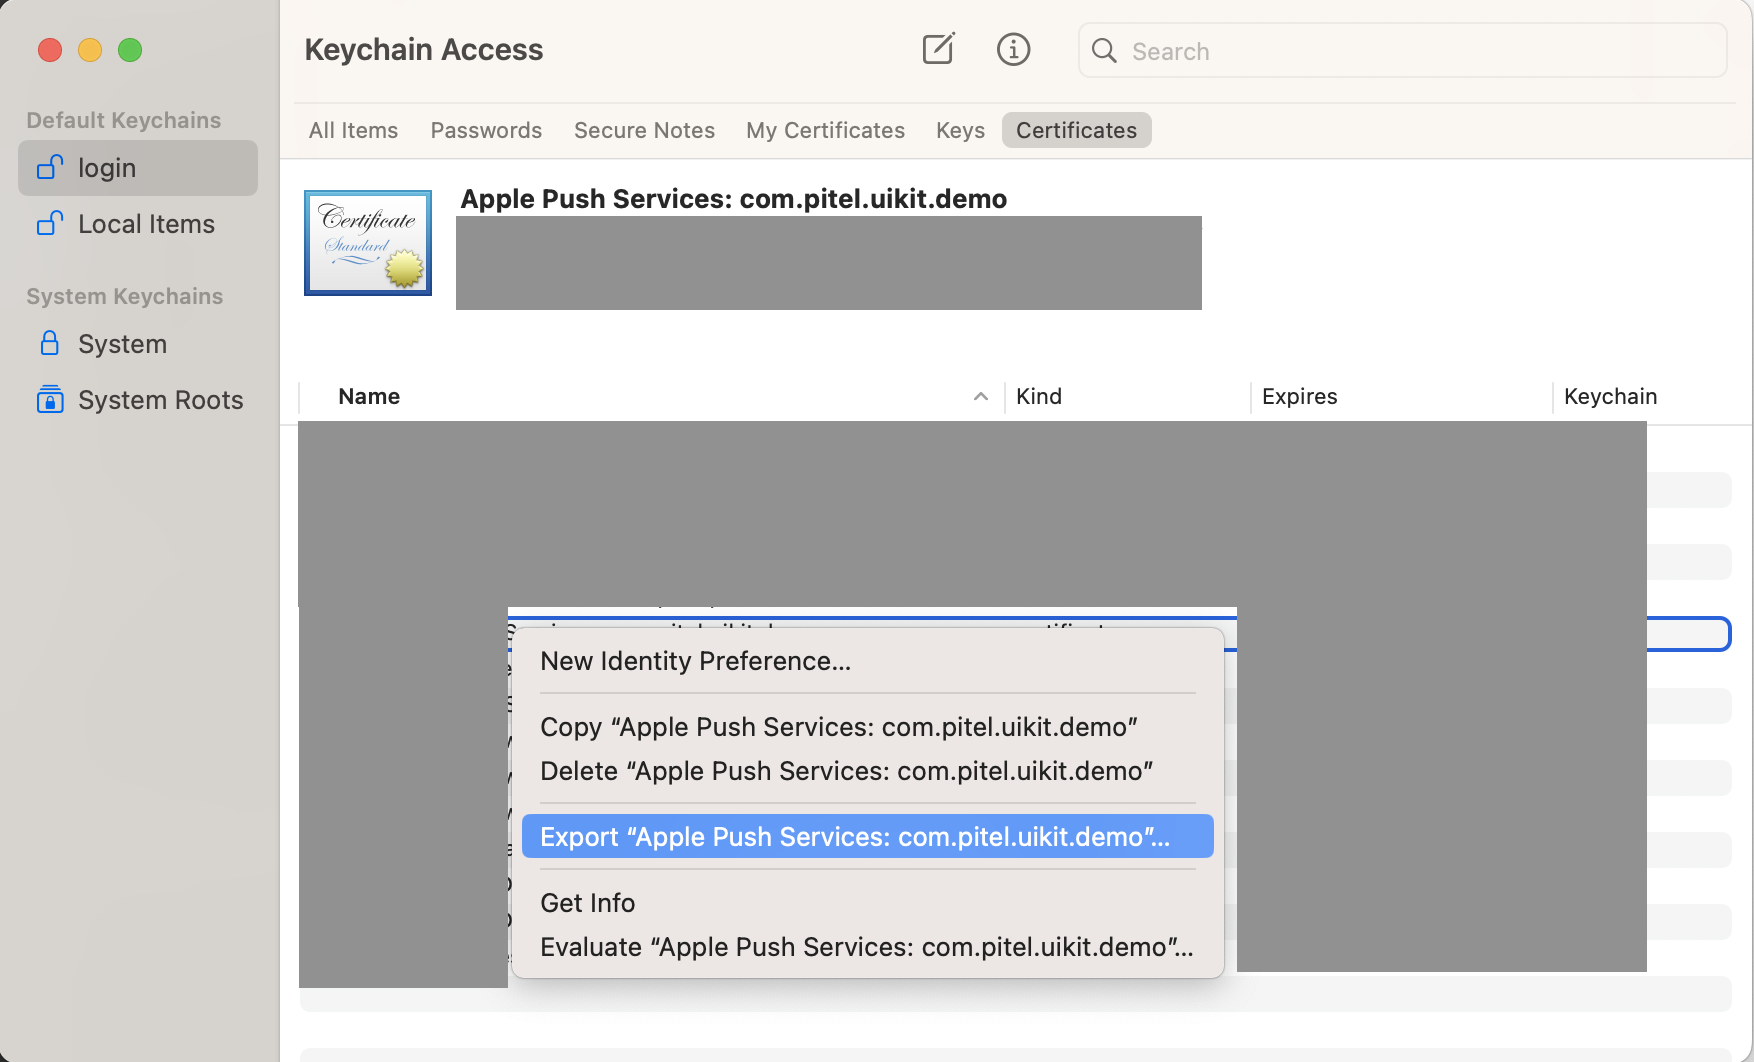
- Install certificate. Download the certificate and install it into the Keychain Access app(download .cer and double click to install).
- **Export the .p12 file.
Setup Pushkit & Callkit
IOS
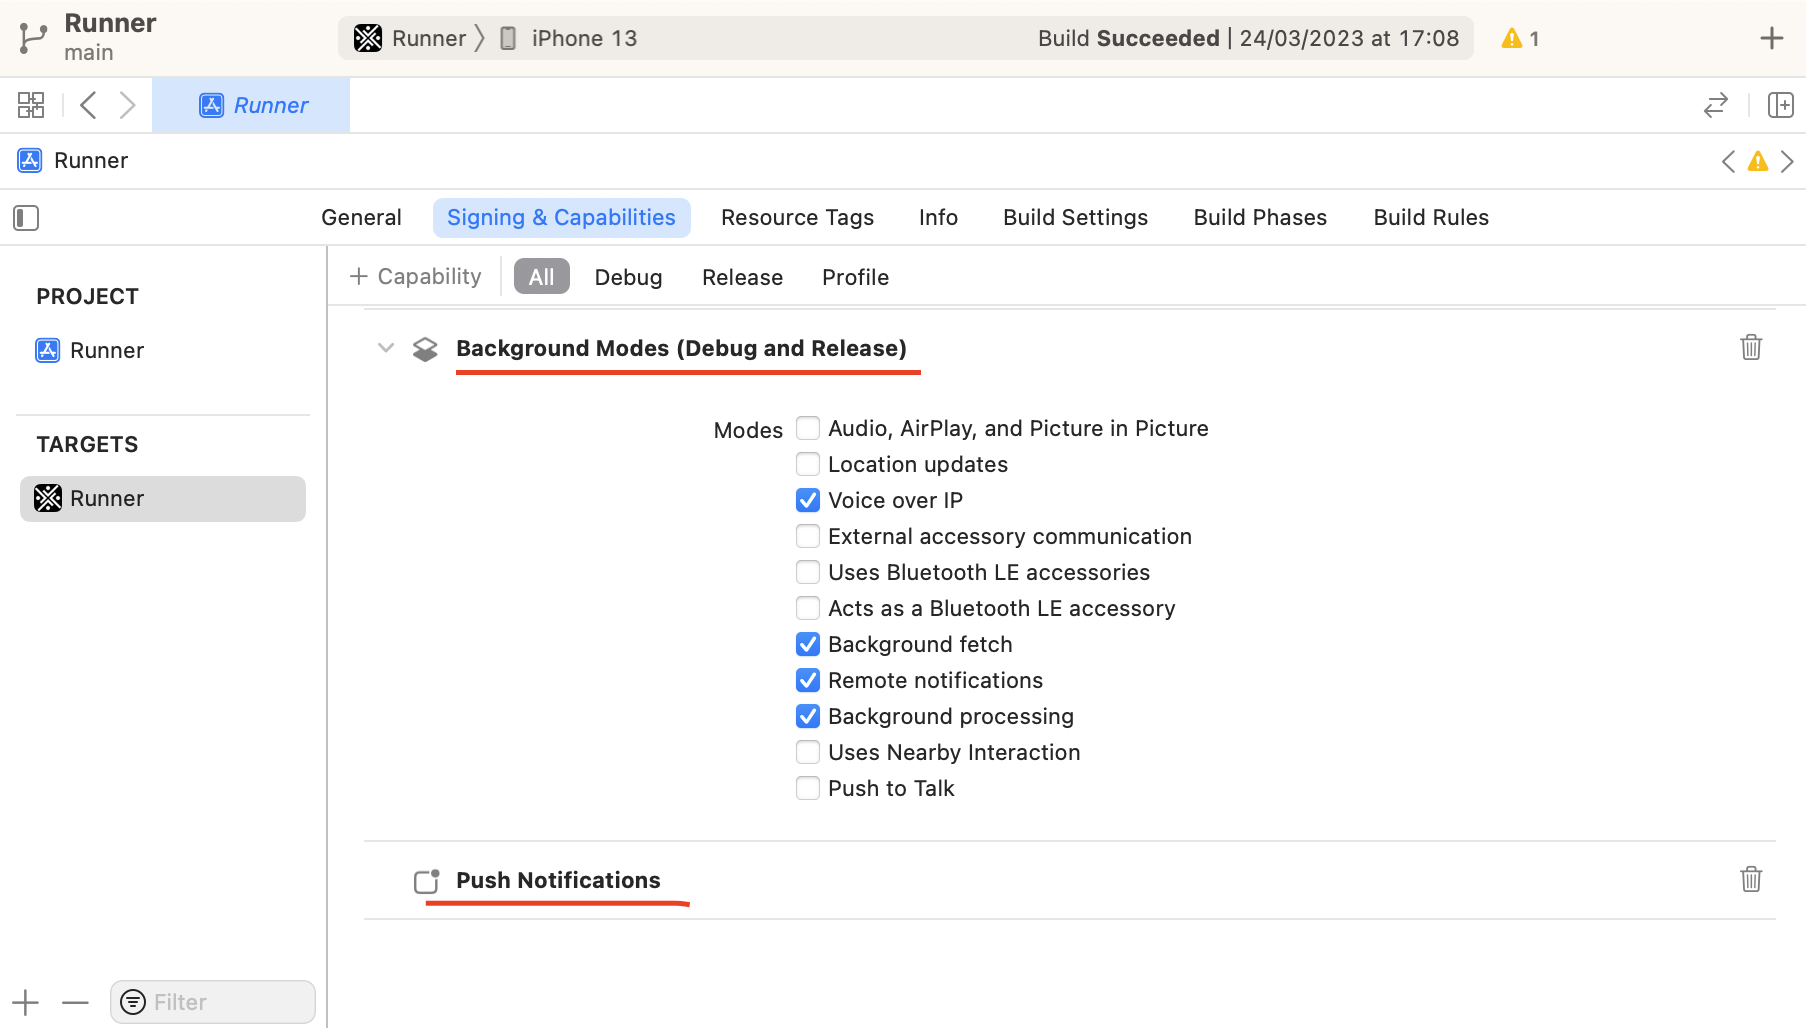
- Open Xcode Project → Capabilities
- In Tab Signing & Capabilities. Enable Push notifications & Background Modes
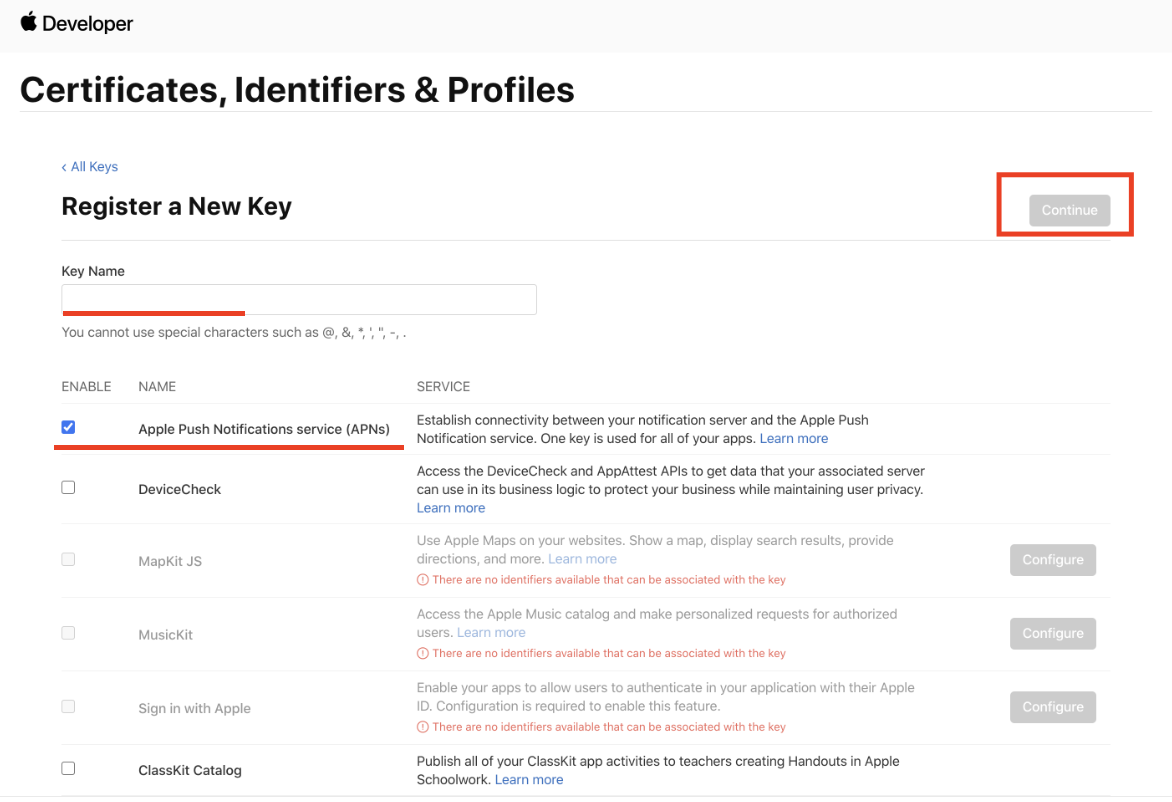
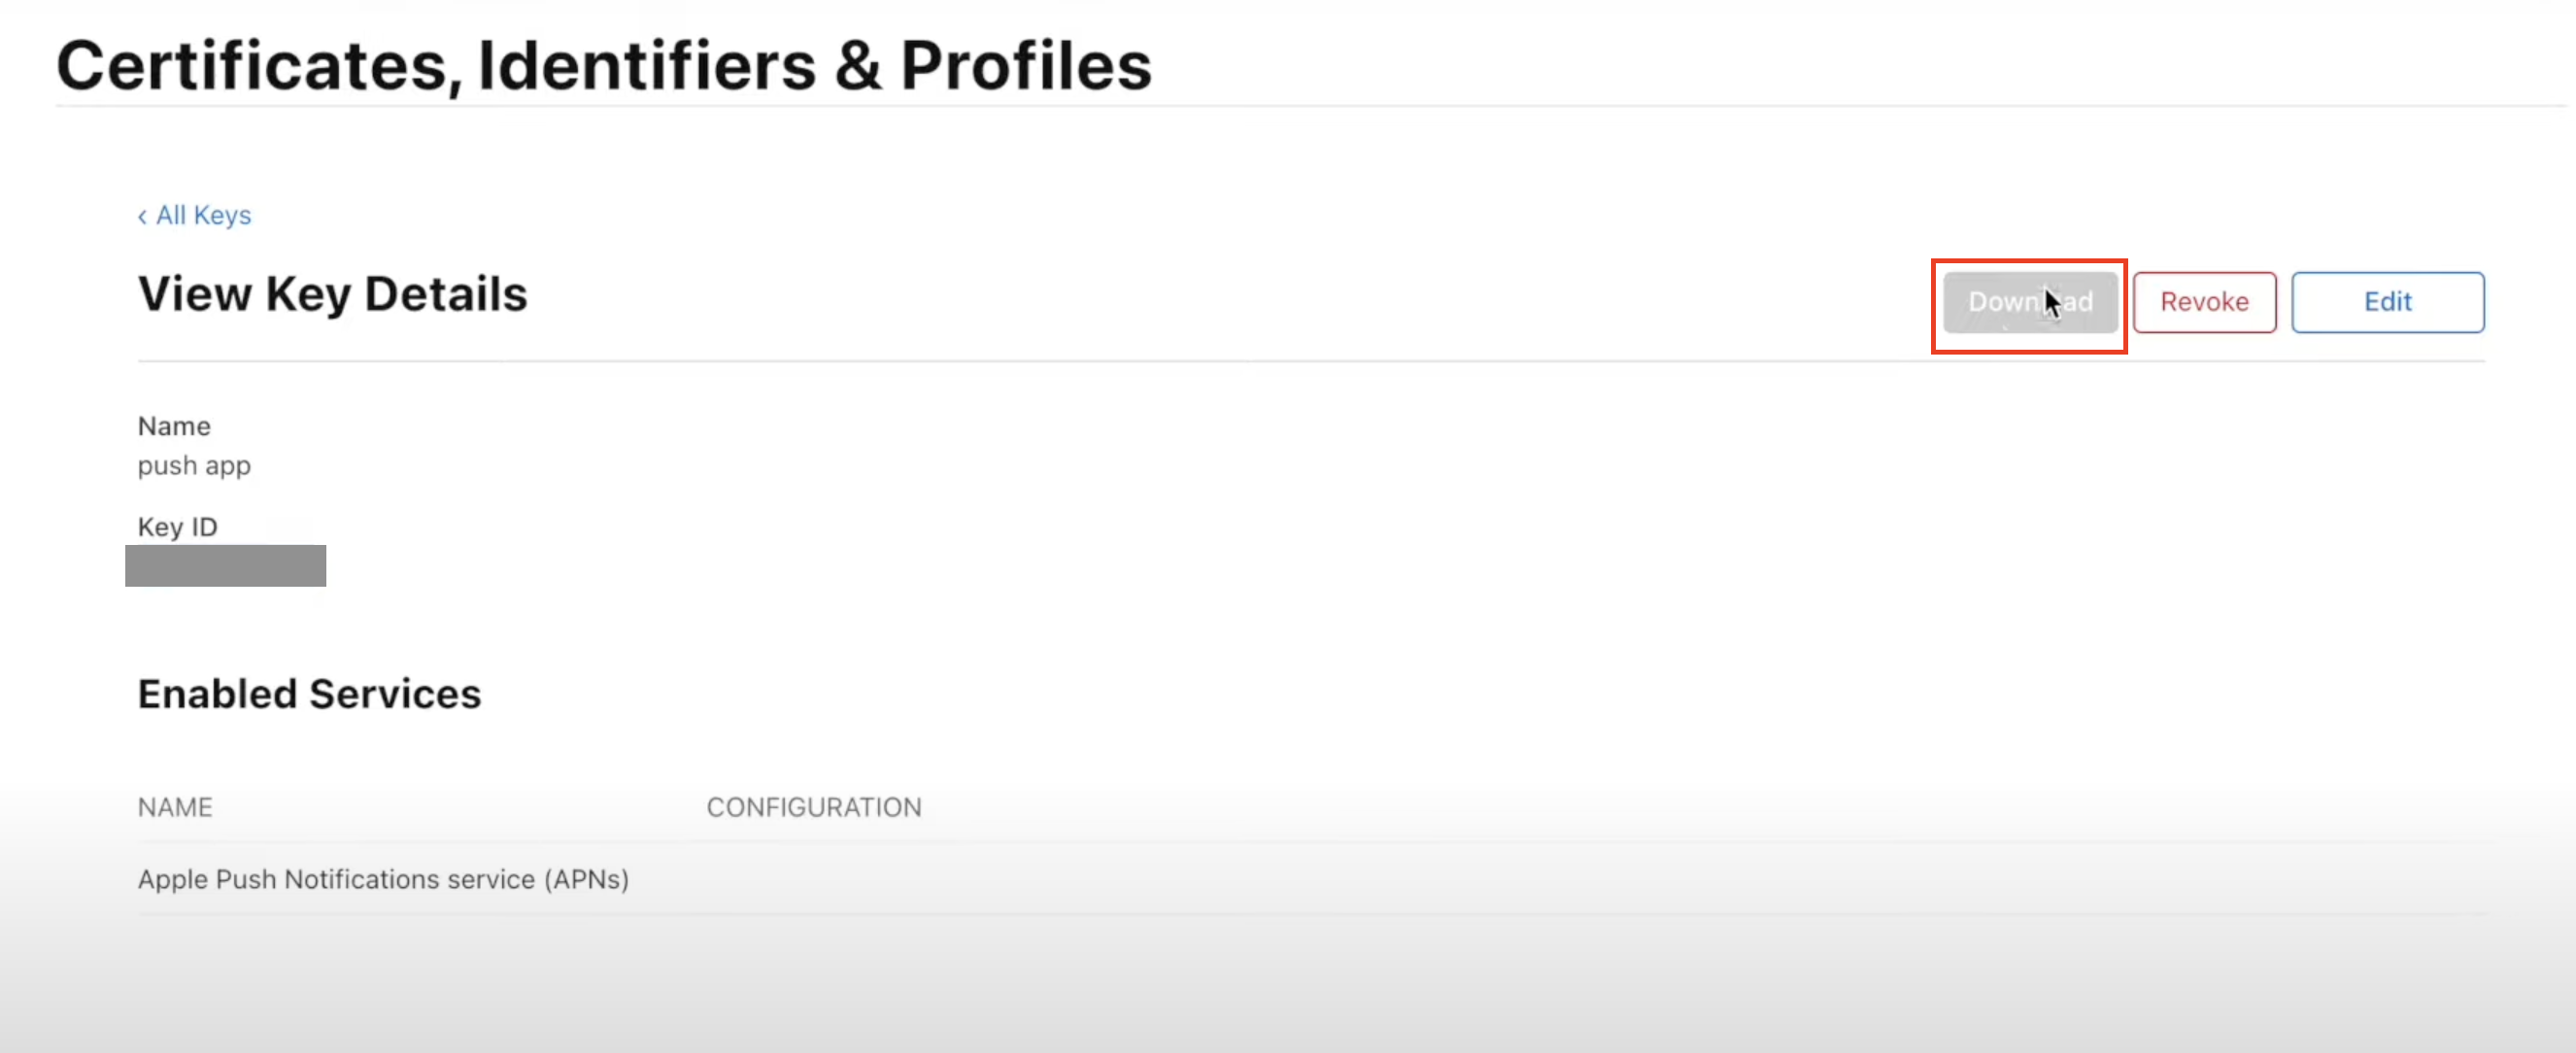
- Create APNs key and upload in firebase project. In your apple developer account.
- Upload APNs key to your firebase
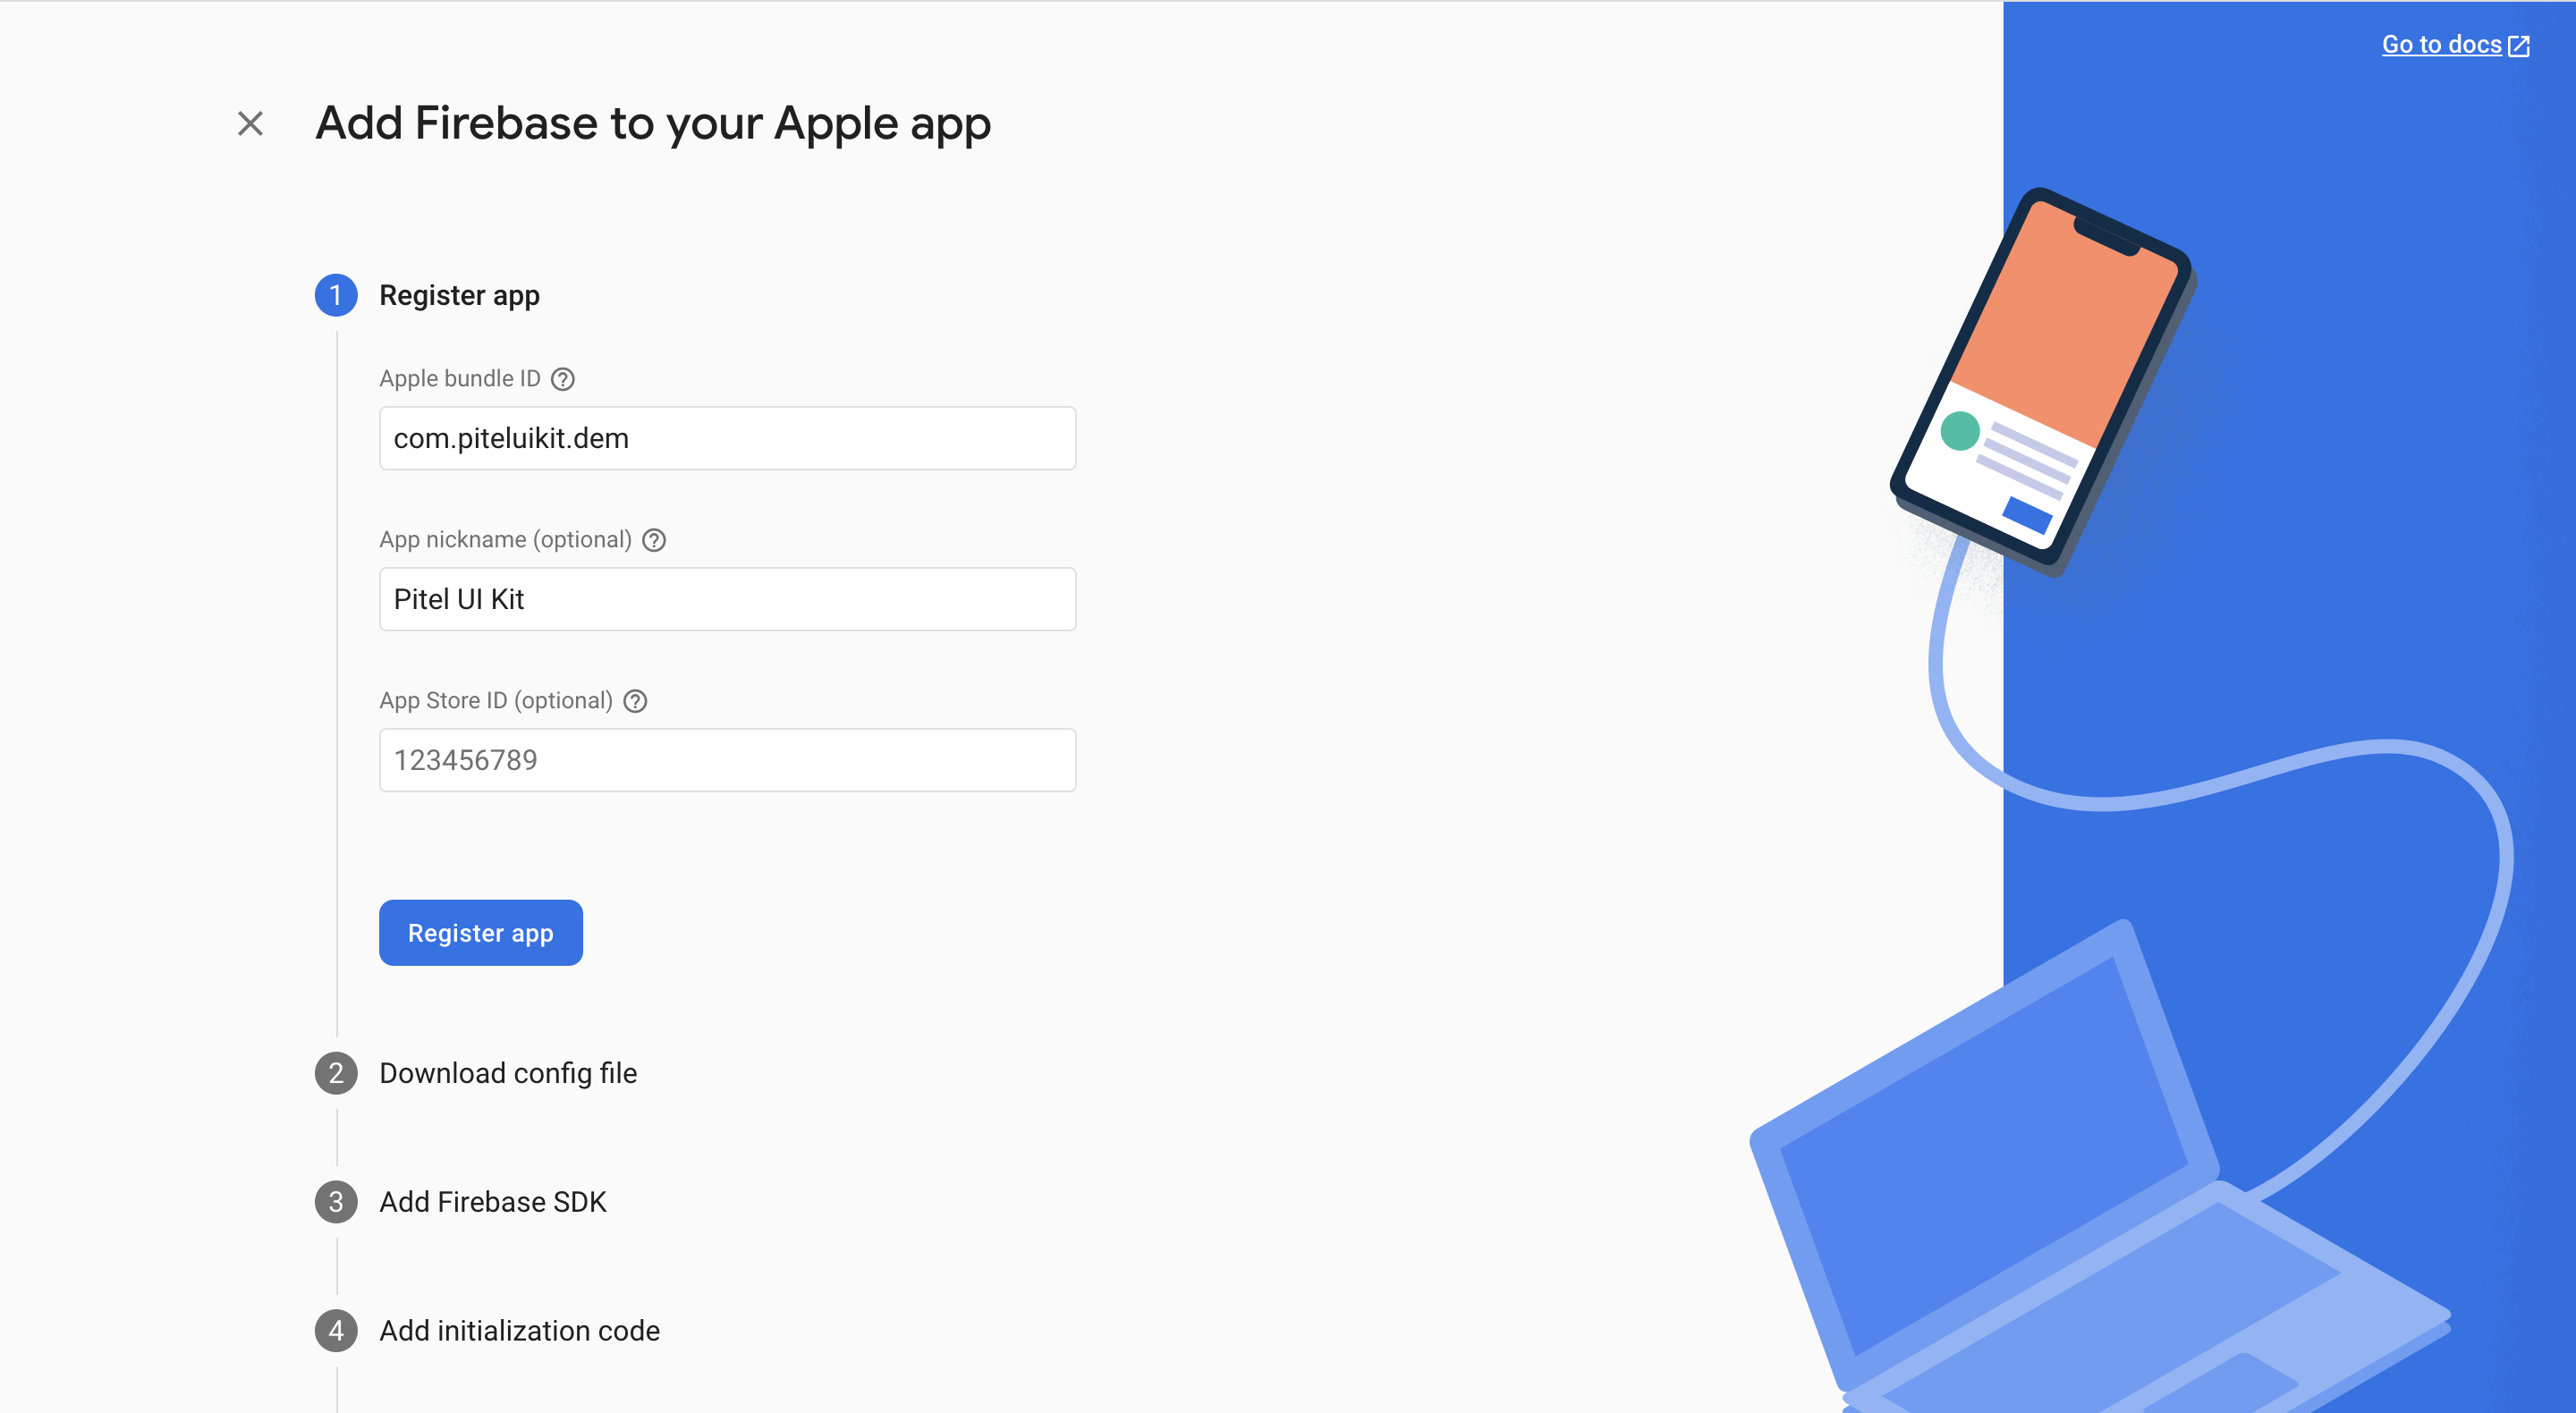
- Create new your IOS App in Firebase project.
- Download file .p8 to upload to firebase
- Select IOS app -> upload Apns key
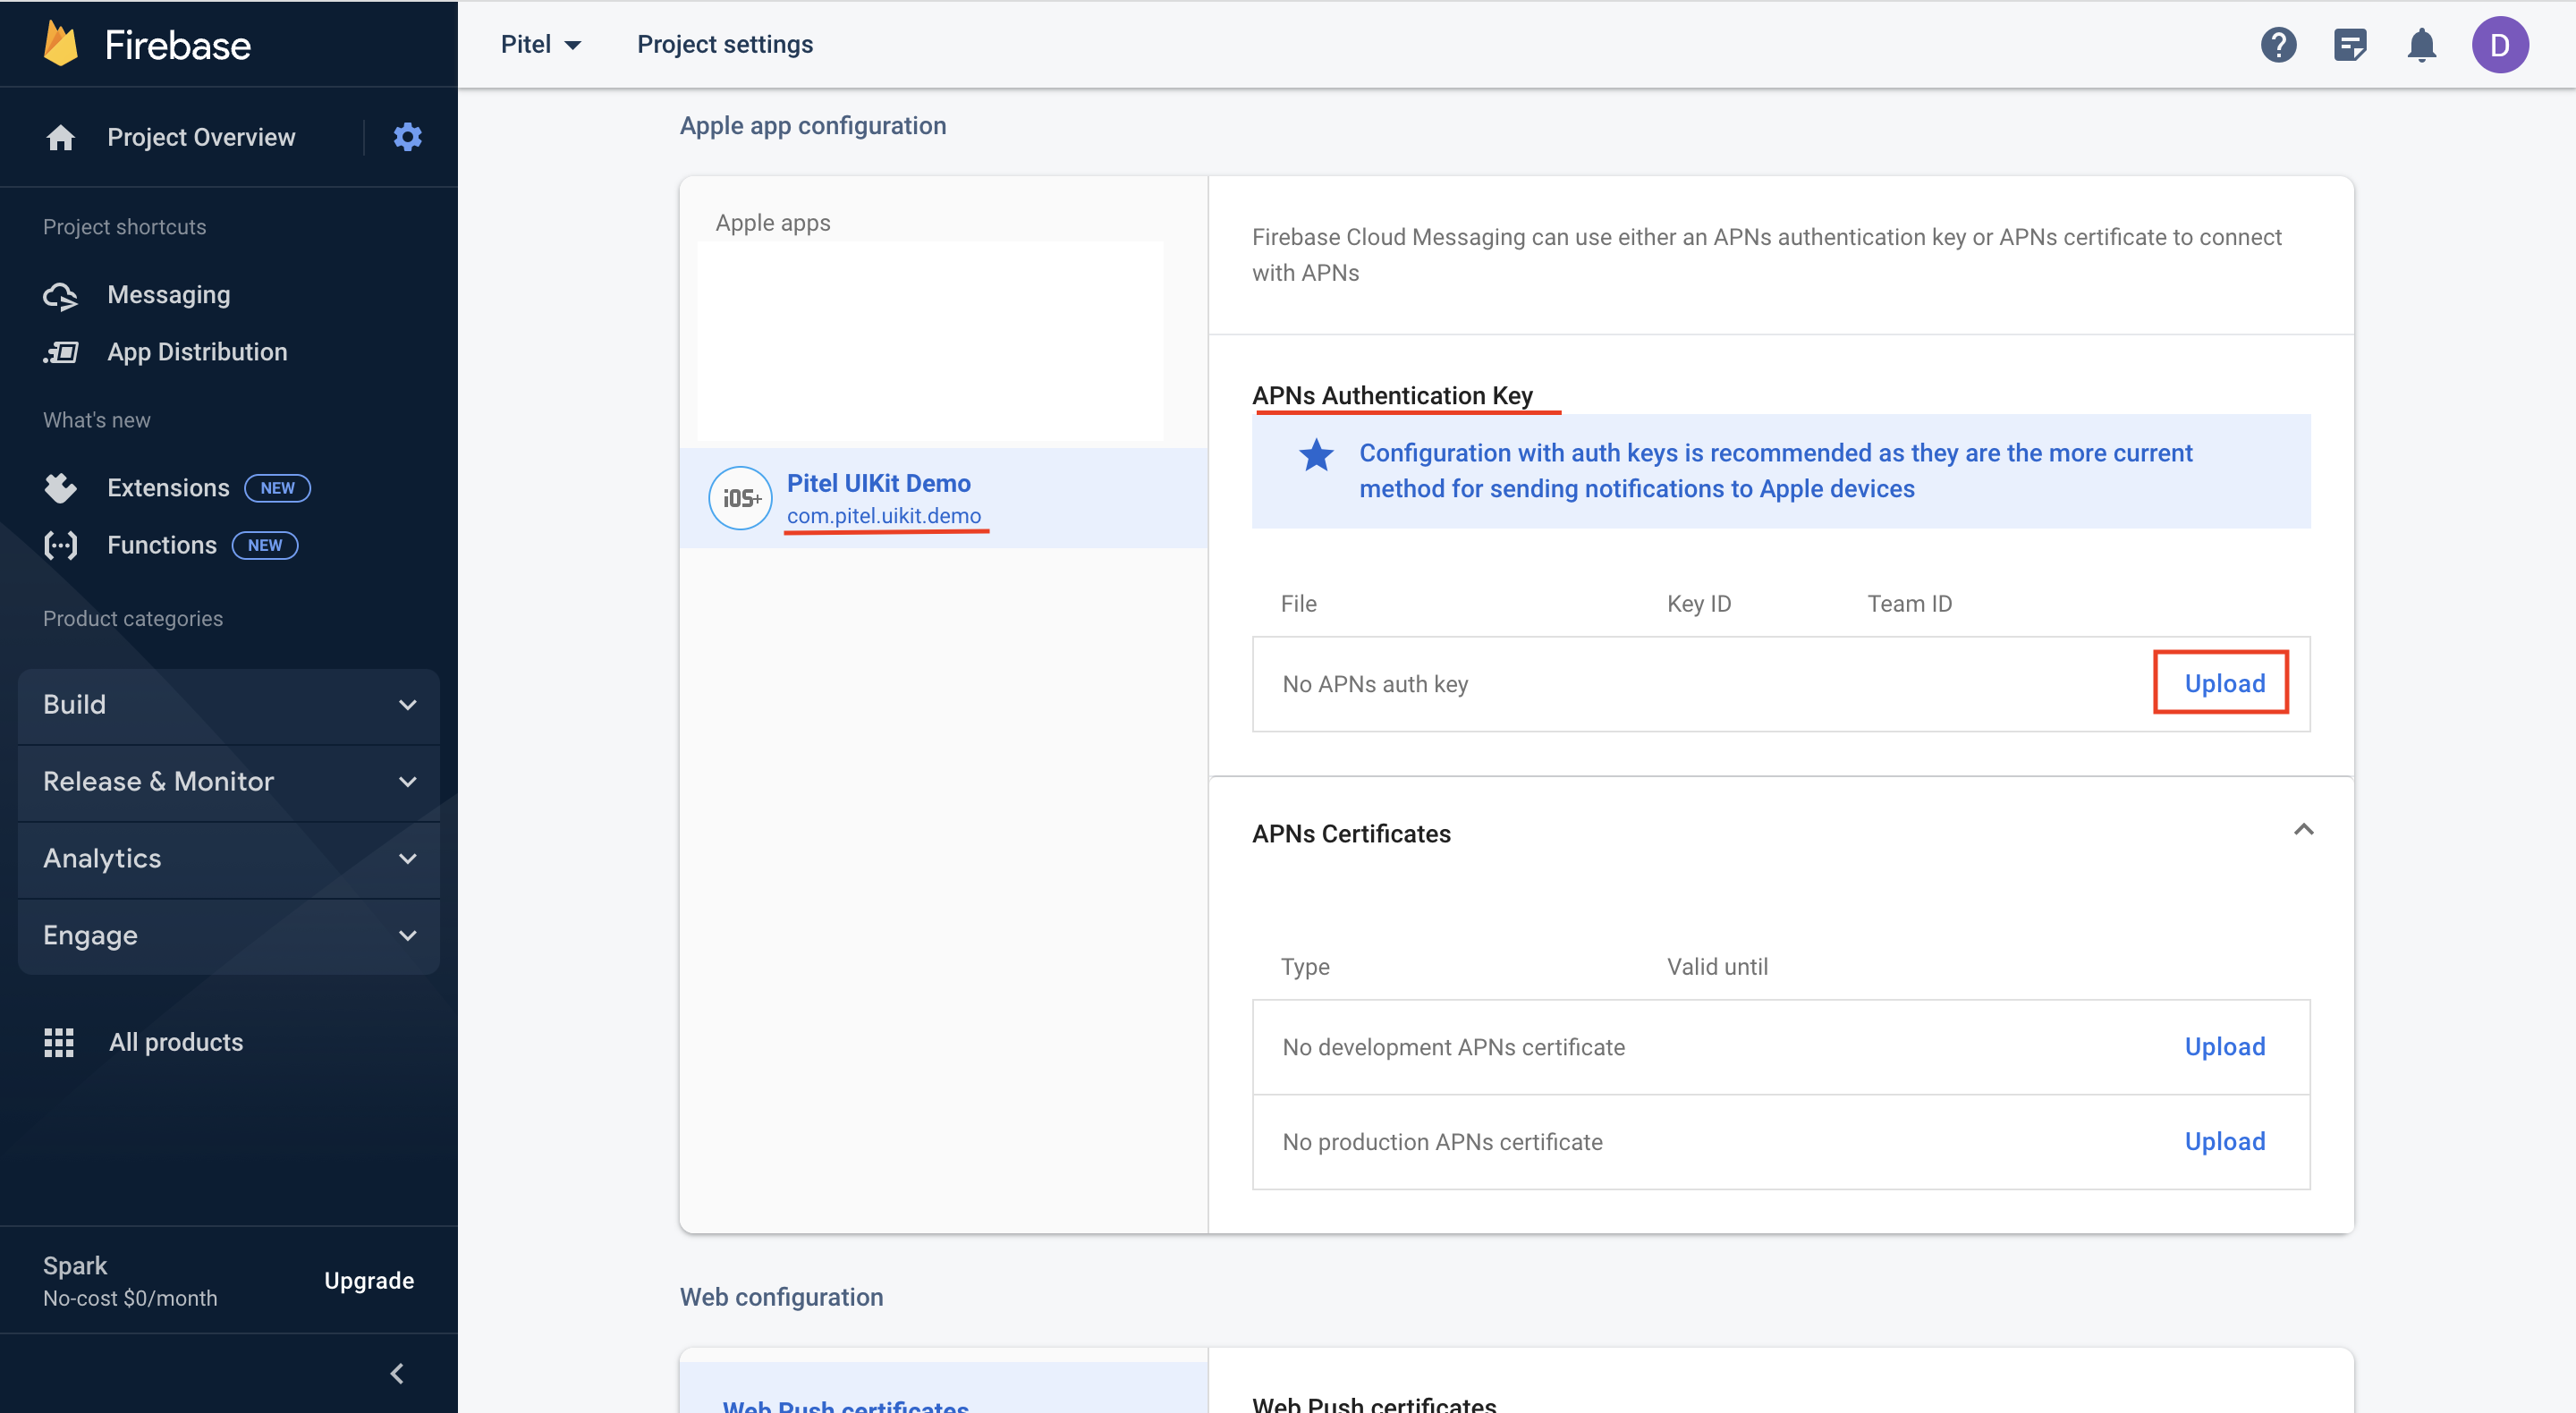
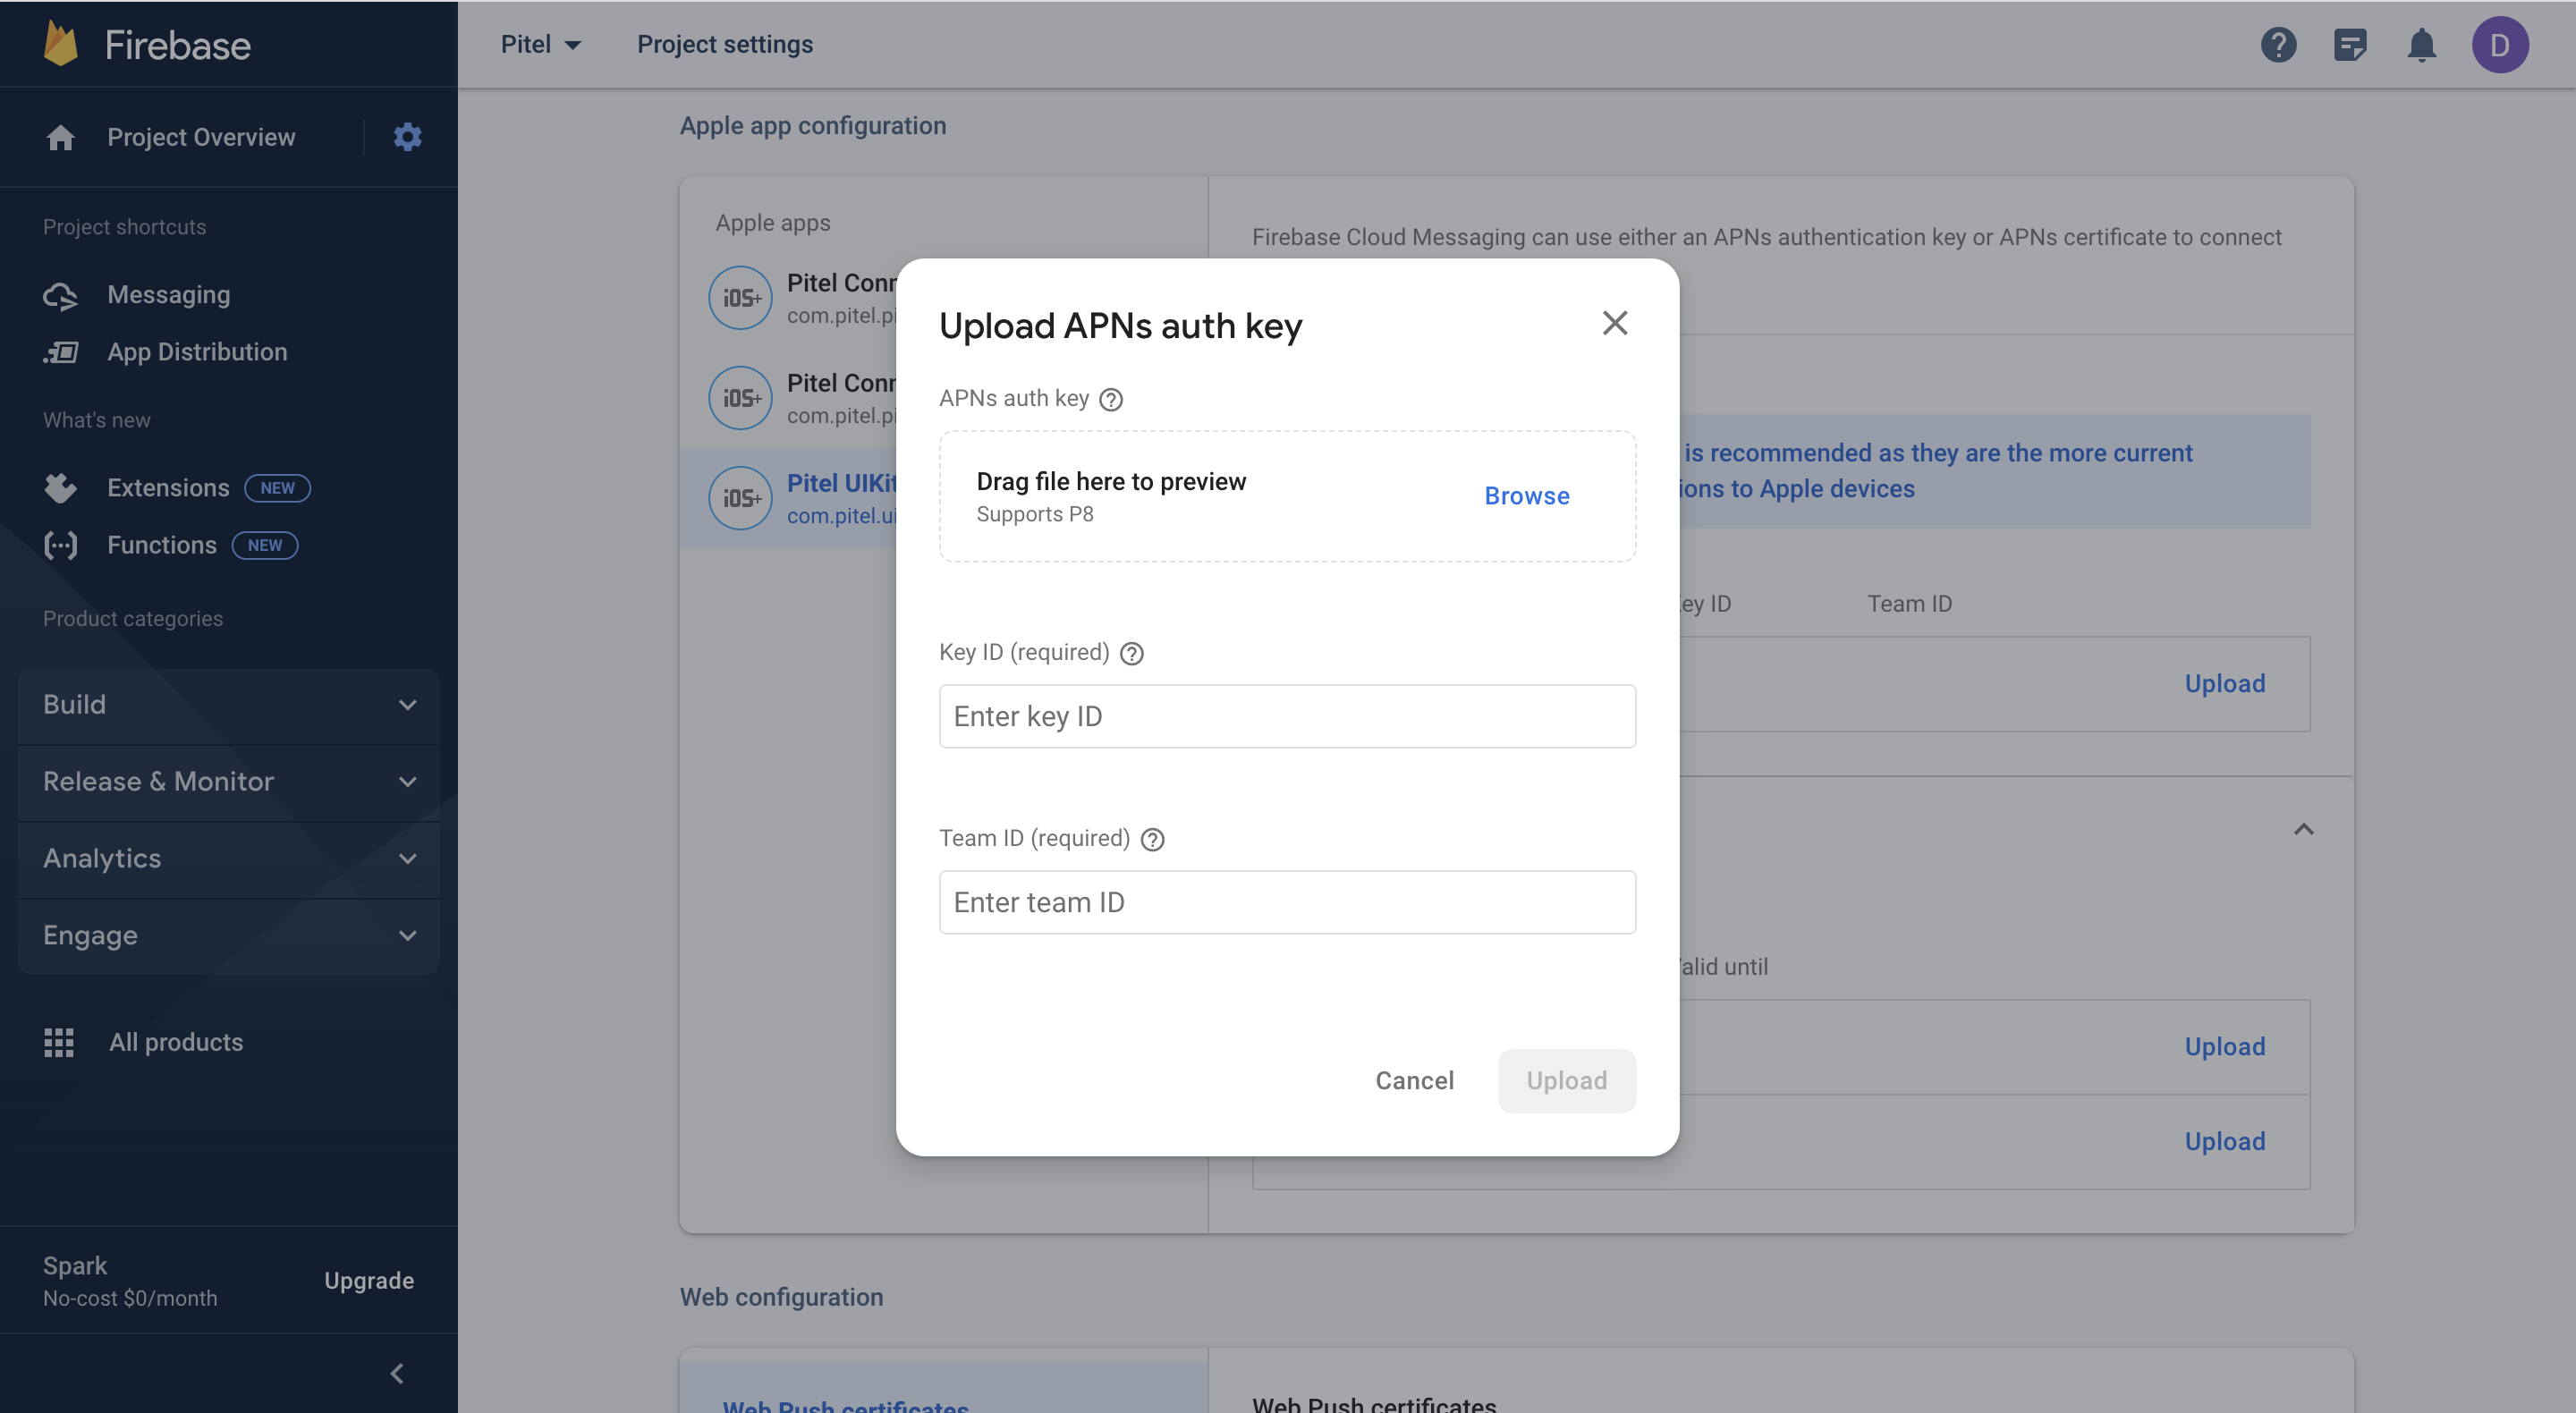
- Fill information in upload Apns key popup
- Create new your IOS App in Firebase project.
Installing your Firebase configuration file
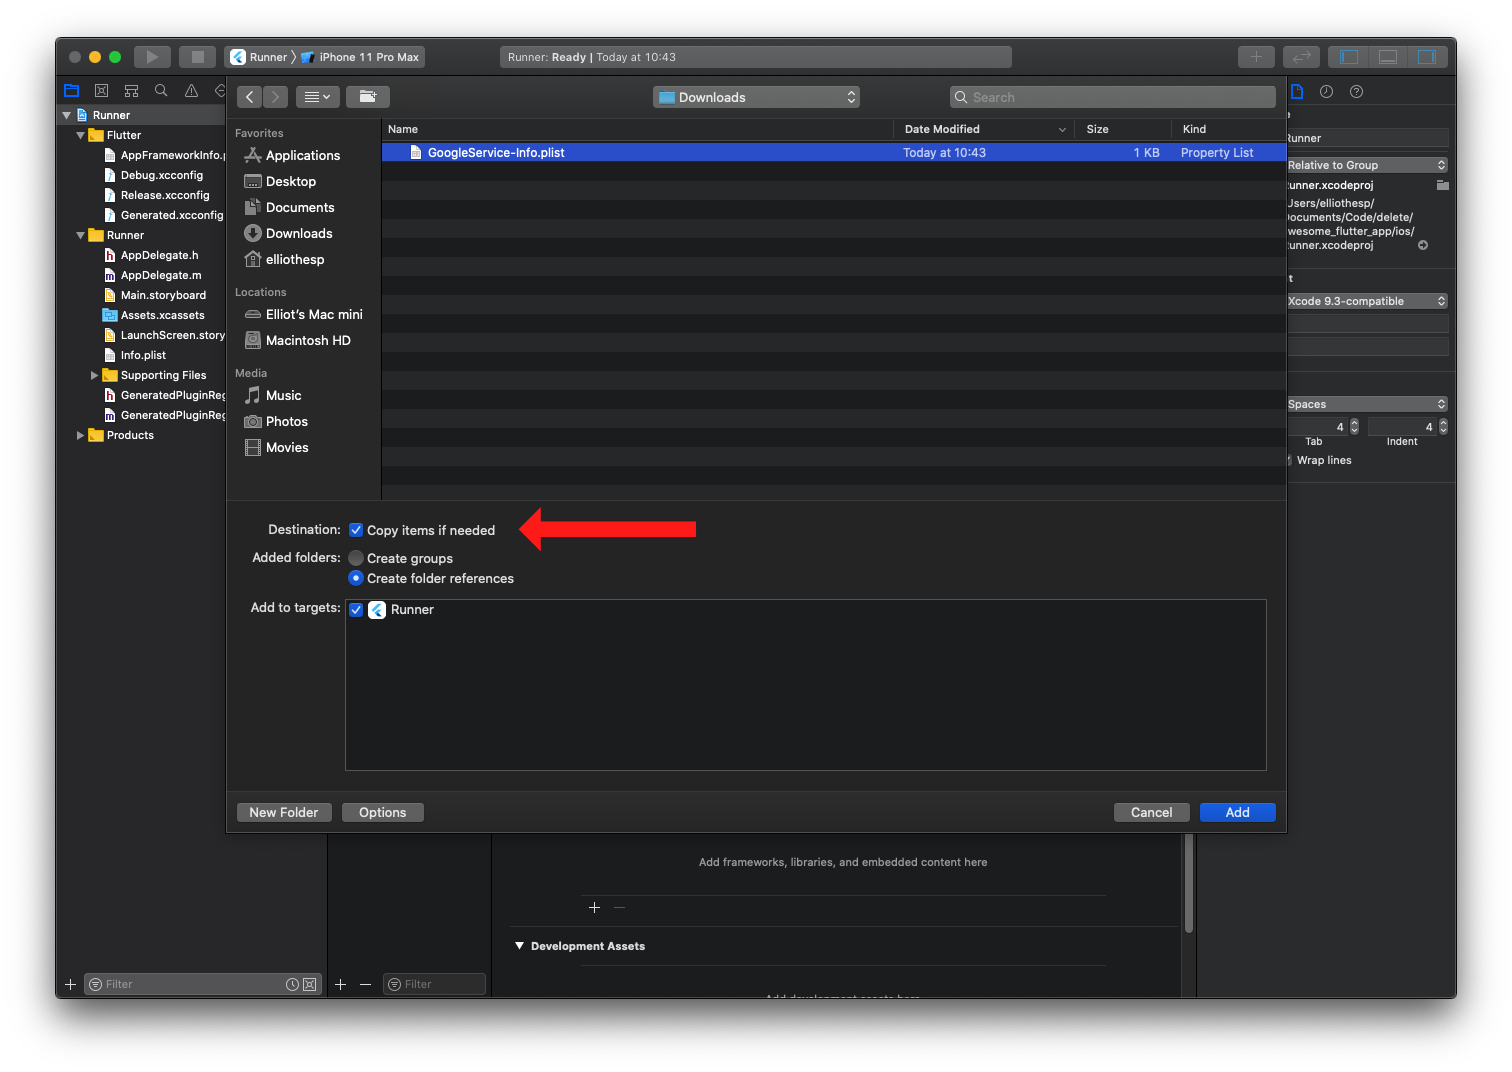
- Next you must add the file to the project using Xcode (adding manually via the filesystem won't link the file to the project). Using Xcode, open the project's
ios/{projectName}.xcworkspacefile. Right click Runner from the left-hand side project navigation within Xcode and select "Add files", as seen below: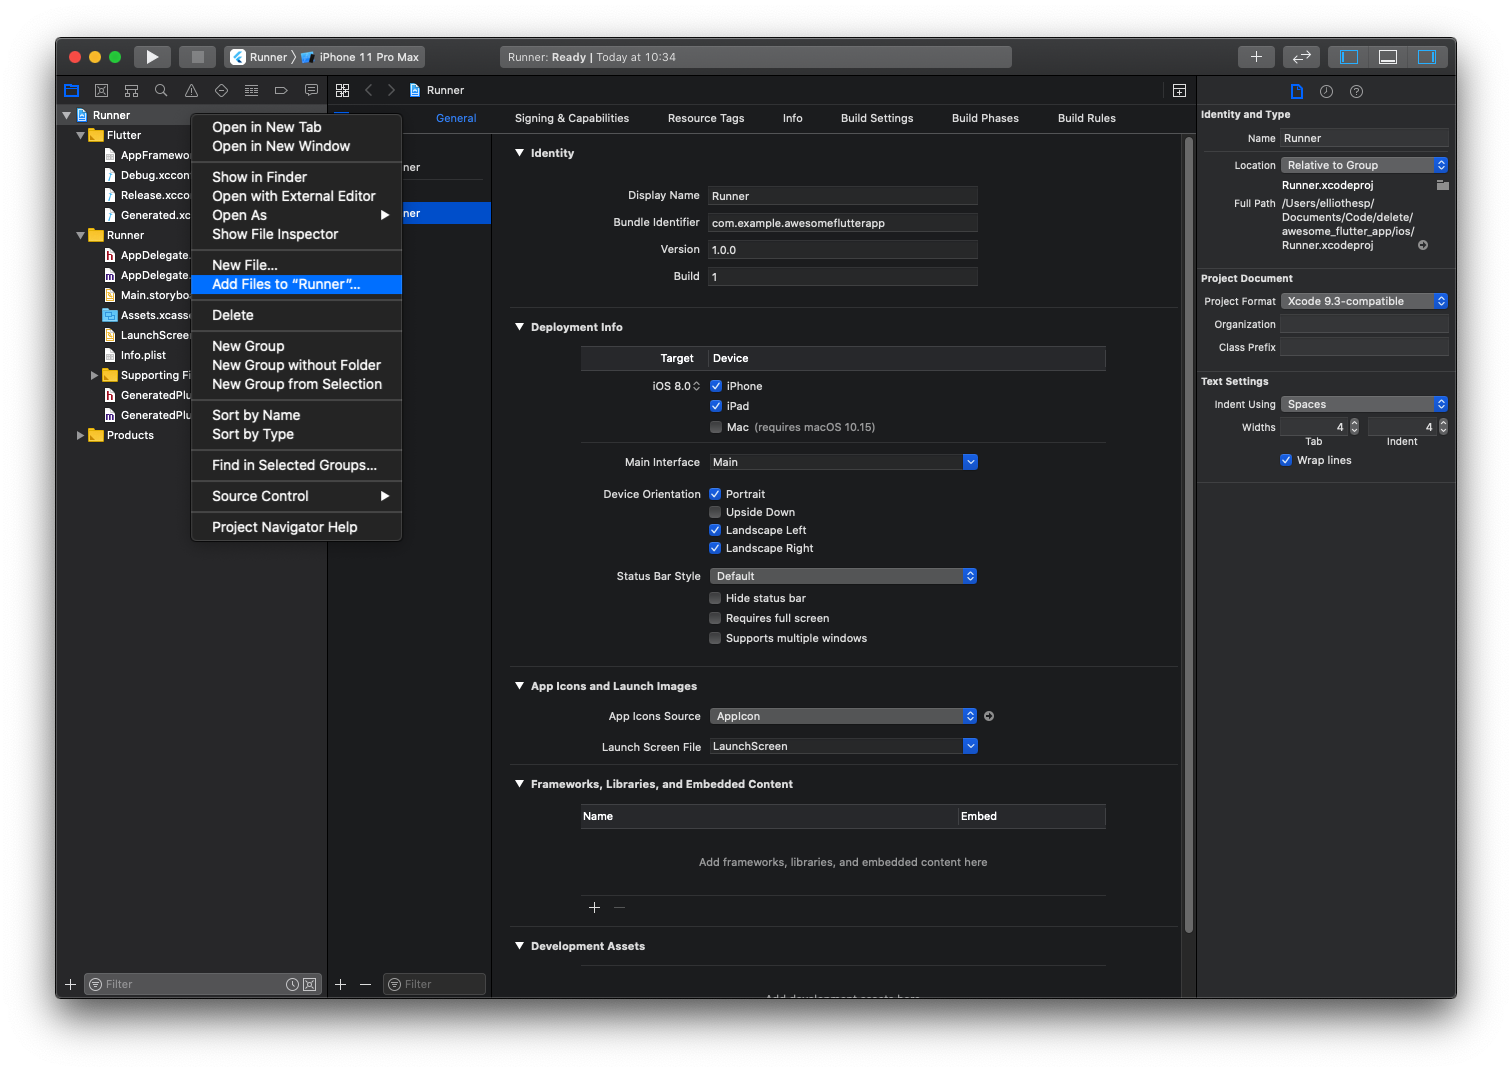
- Select the GoogleService-Info.plist file you downloaded, and ensure the "Copy items if needed" checkbox is enabled:
Android
Using FCM (Firebase Cloud Message) to handle push notification wake up app when app run on Background or Terminate
Warning Popup request permission only working with targetSdkVersion >= 33
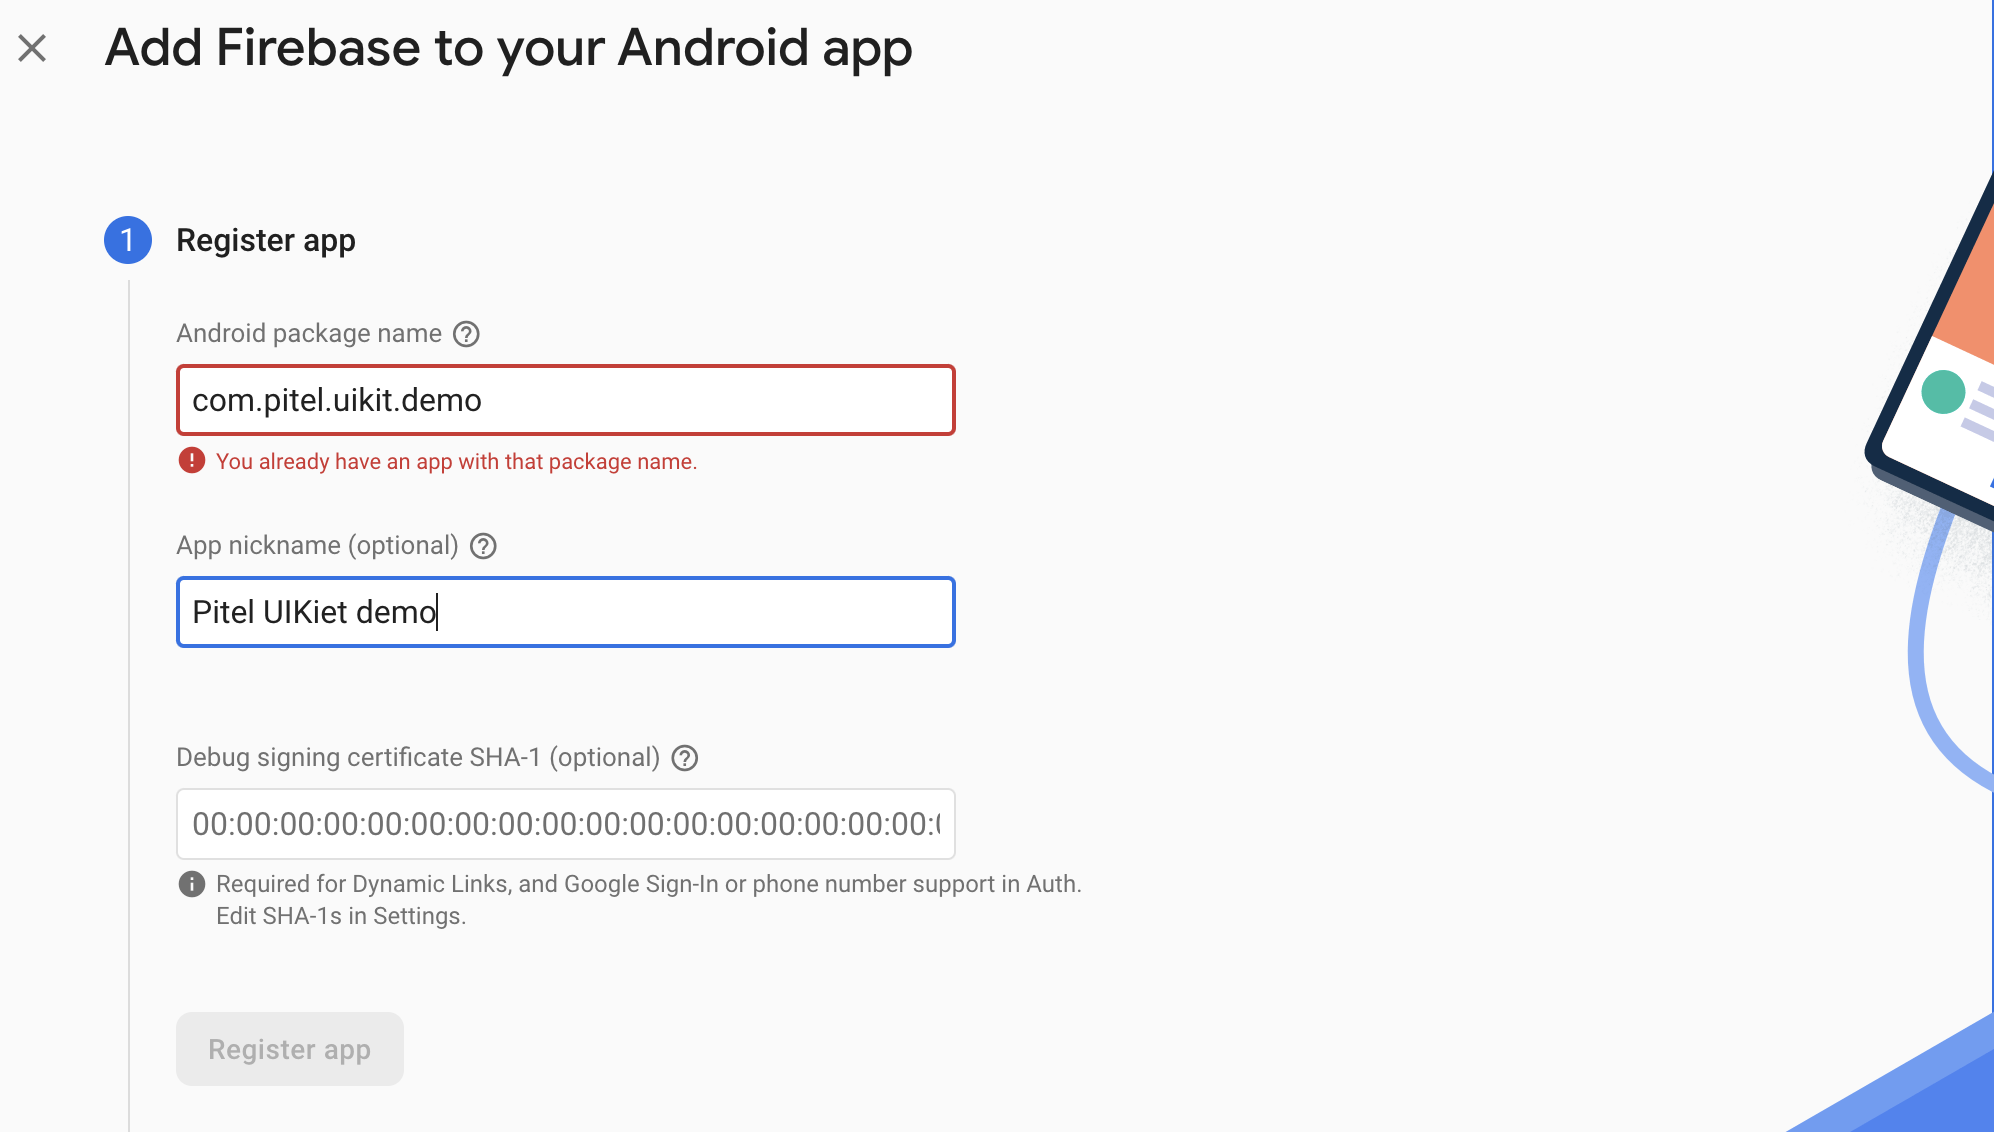
- Access link https://console.firebase.google.com/u/0/project/_/notification
- Create your packageId for android app
- Download & copy file google_service.json -> replace file google_service.json in path:
android/app/google_service.json
Firebase Project
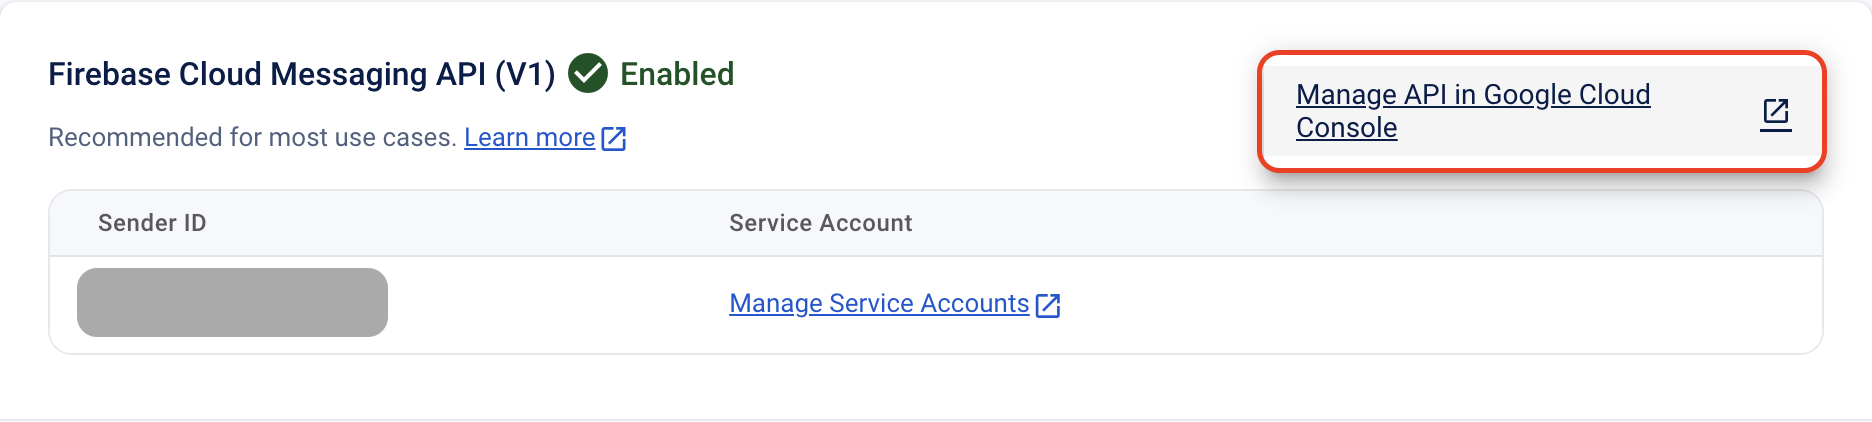
- Go to Project settings > Cloud Messaging and select Manage API in Google Cloud Console to open Google Cloud Console.
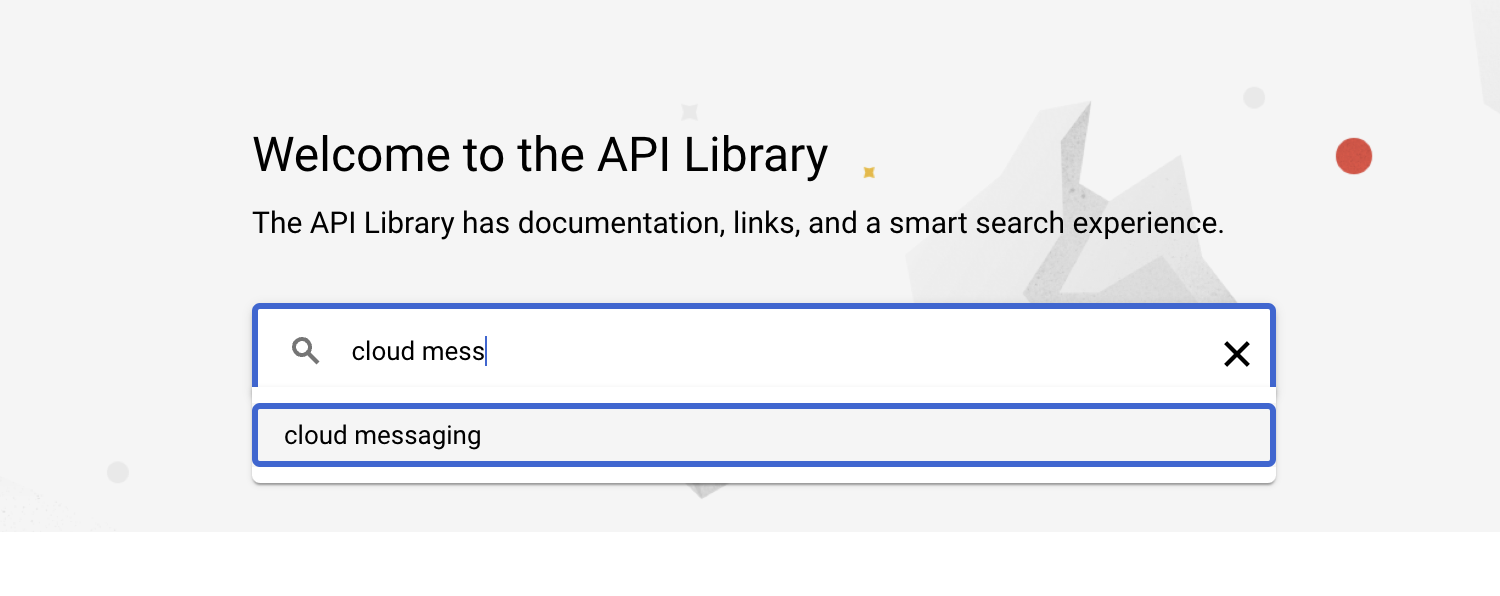
- Go to API Library using the back button as shown below.
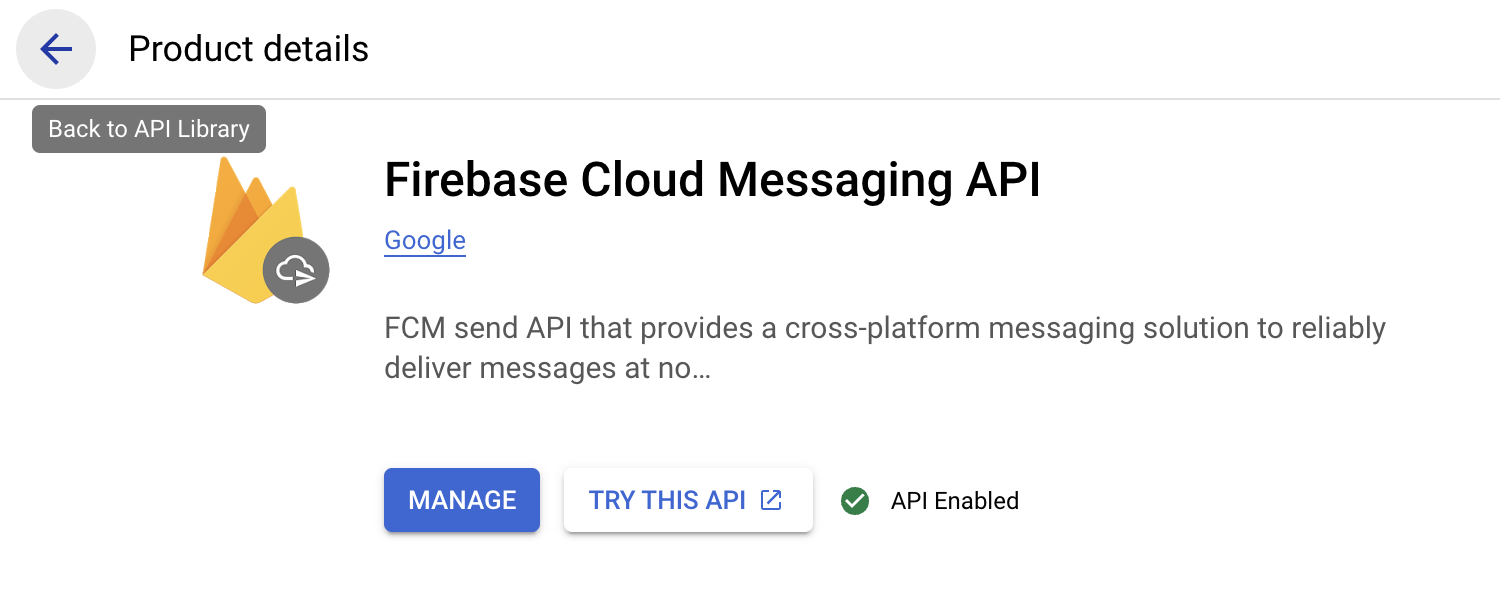
- Search "cloud messaging" -> Select "Cloud Messaging"
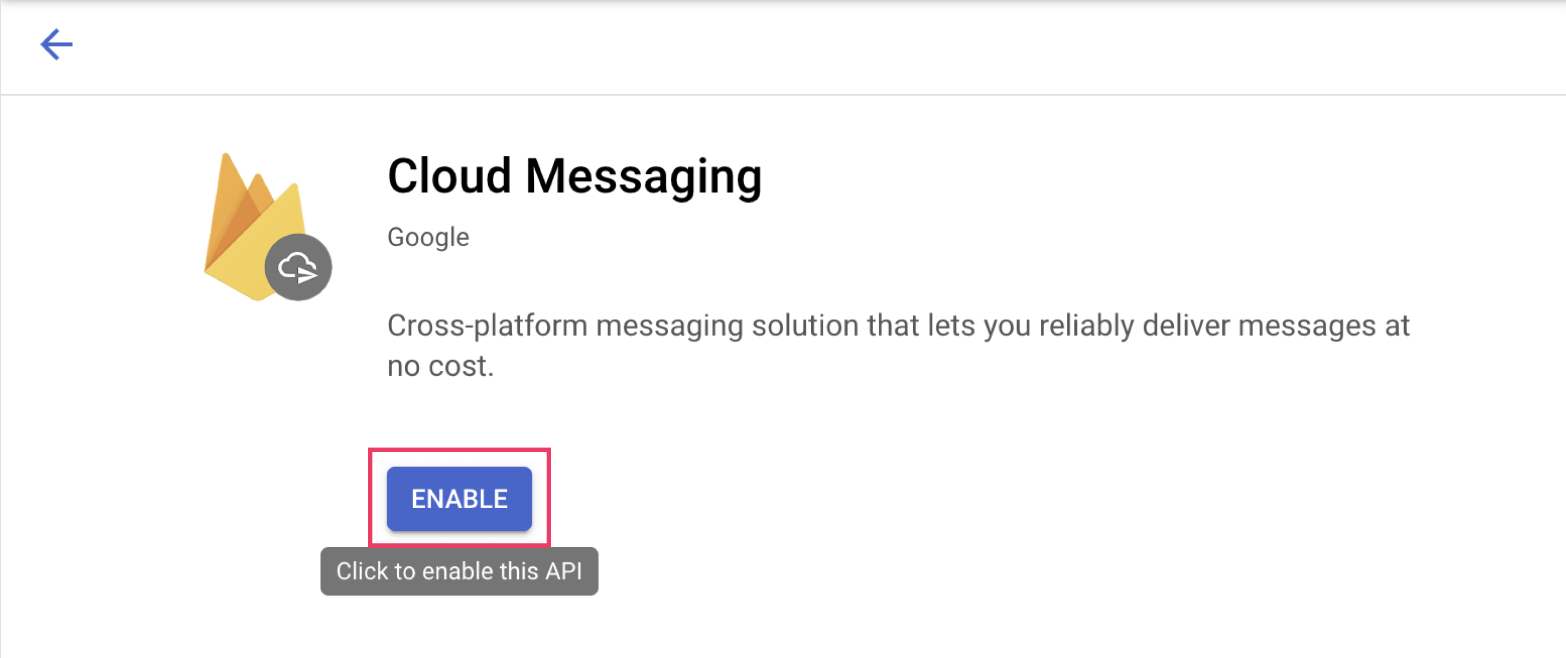
- Click Enable to start using the Cloud Messaging API.
Service Account
- Go to Project settings > Cloud Messaging and select Manage API in Google Cloud Console to open Google Cloud Console.
- In tab "Credentials", scroll to "Service Accounts", click button edit with name "firebase-adminsdk".
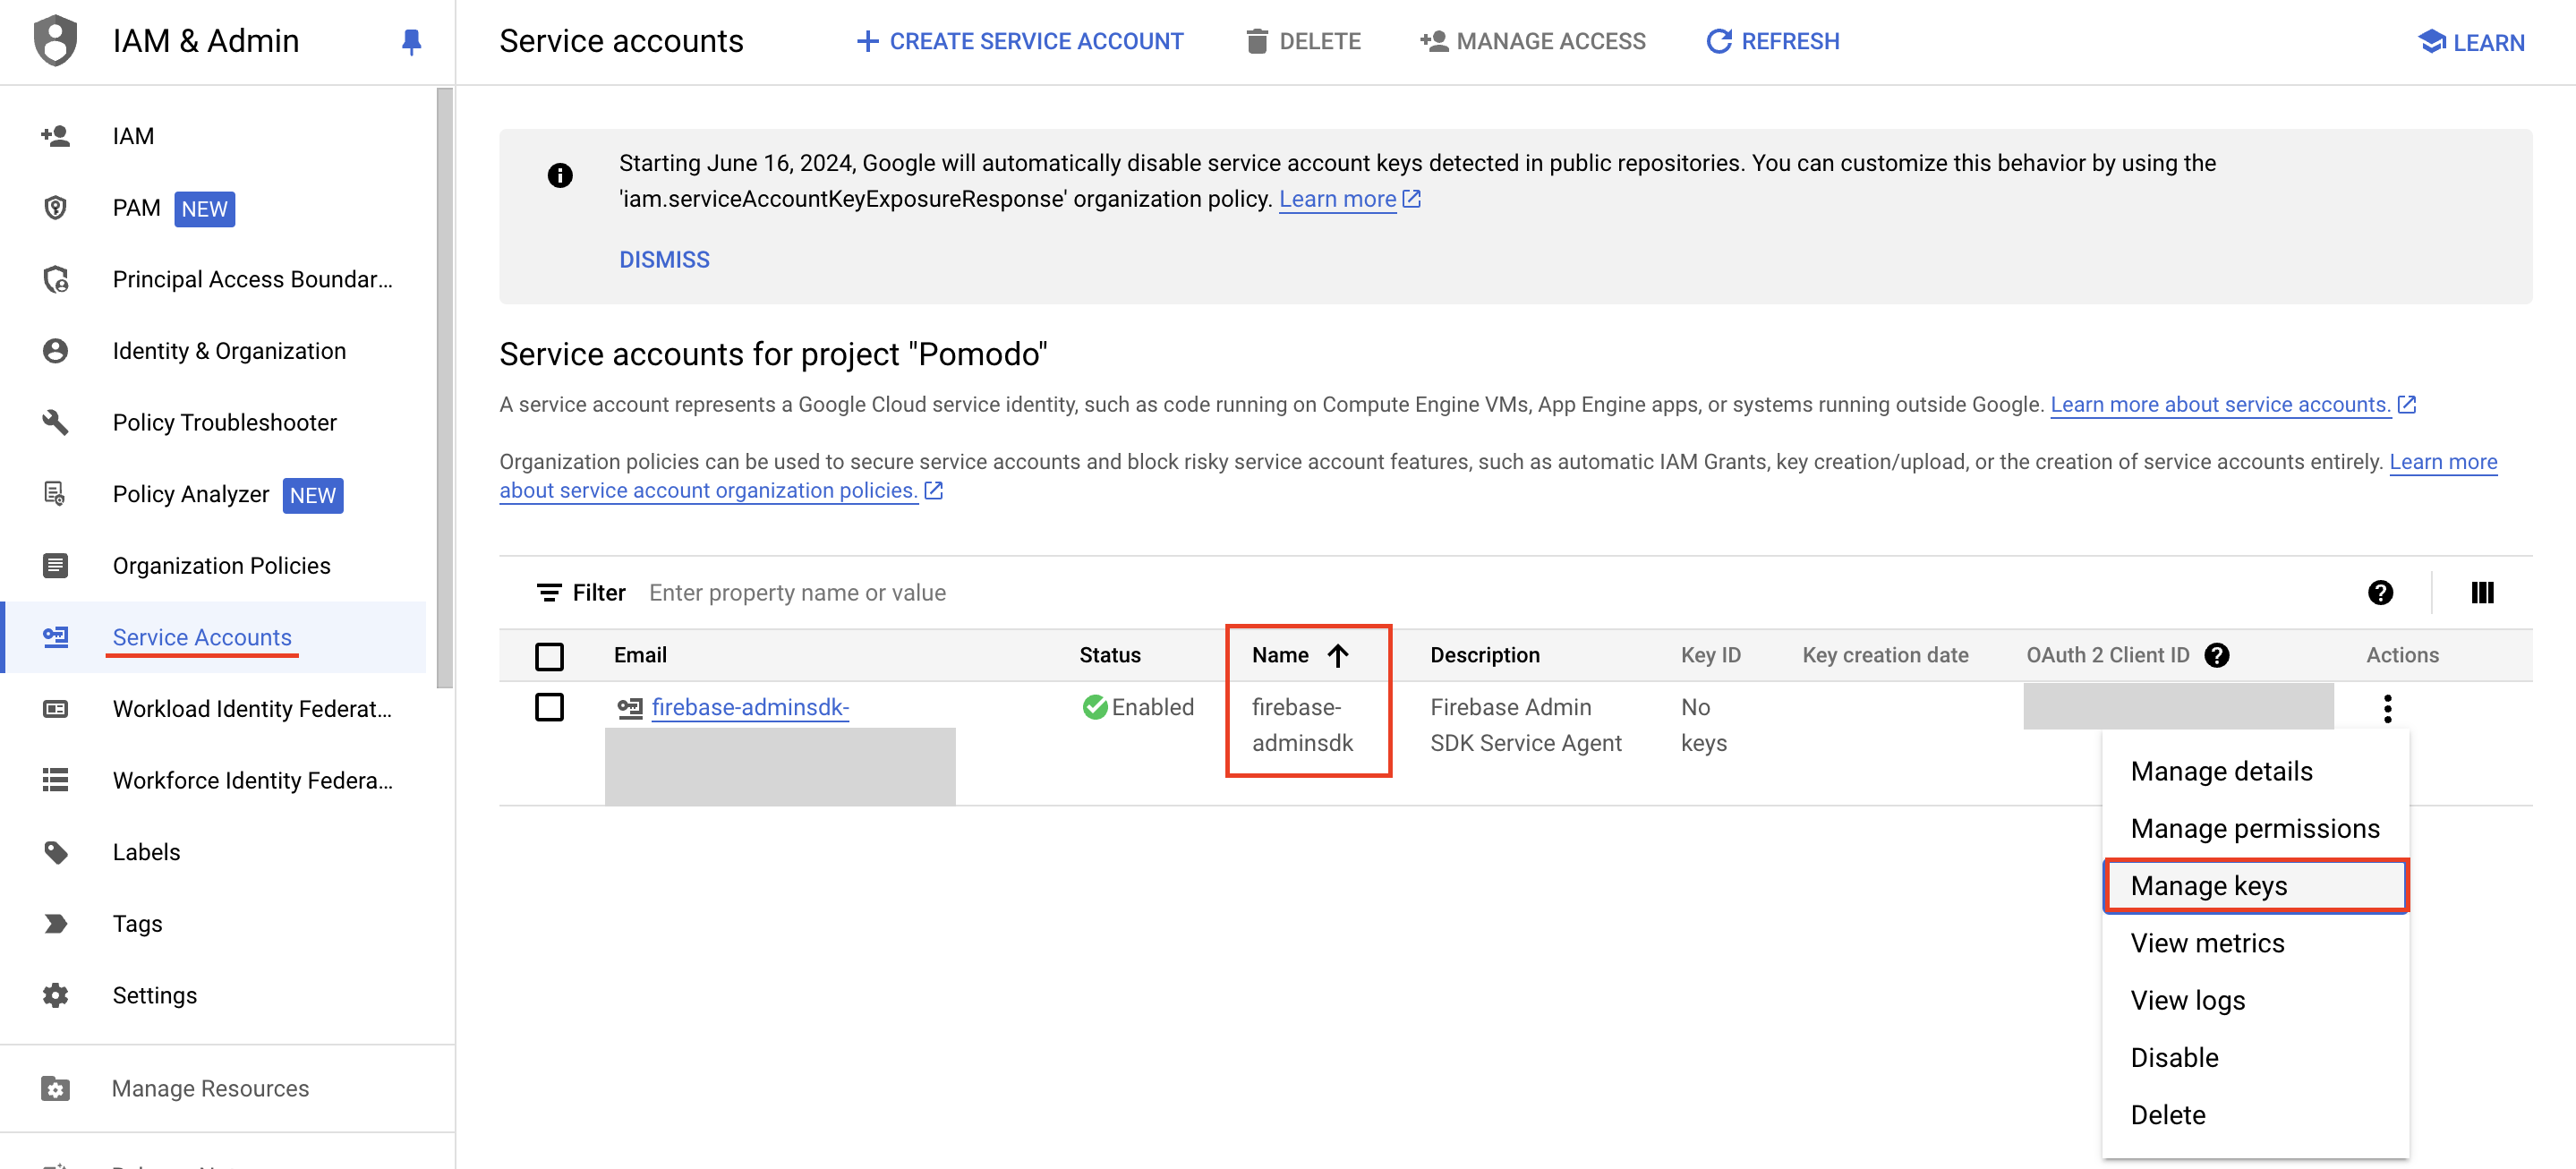
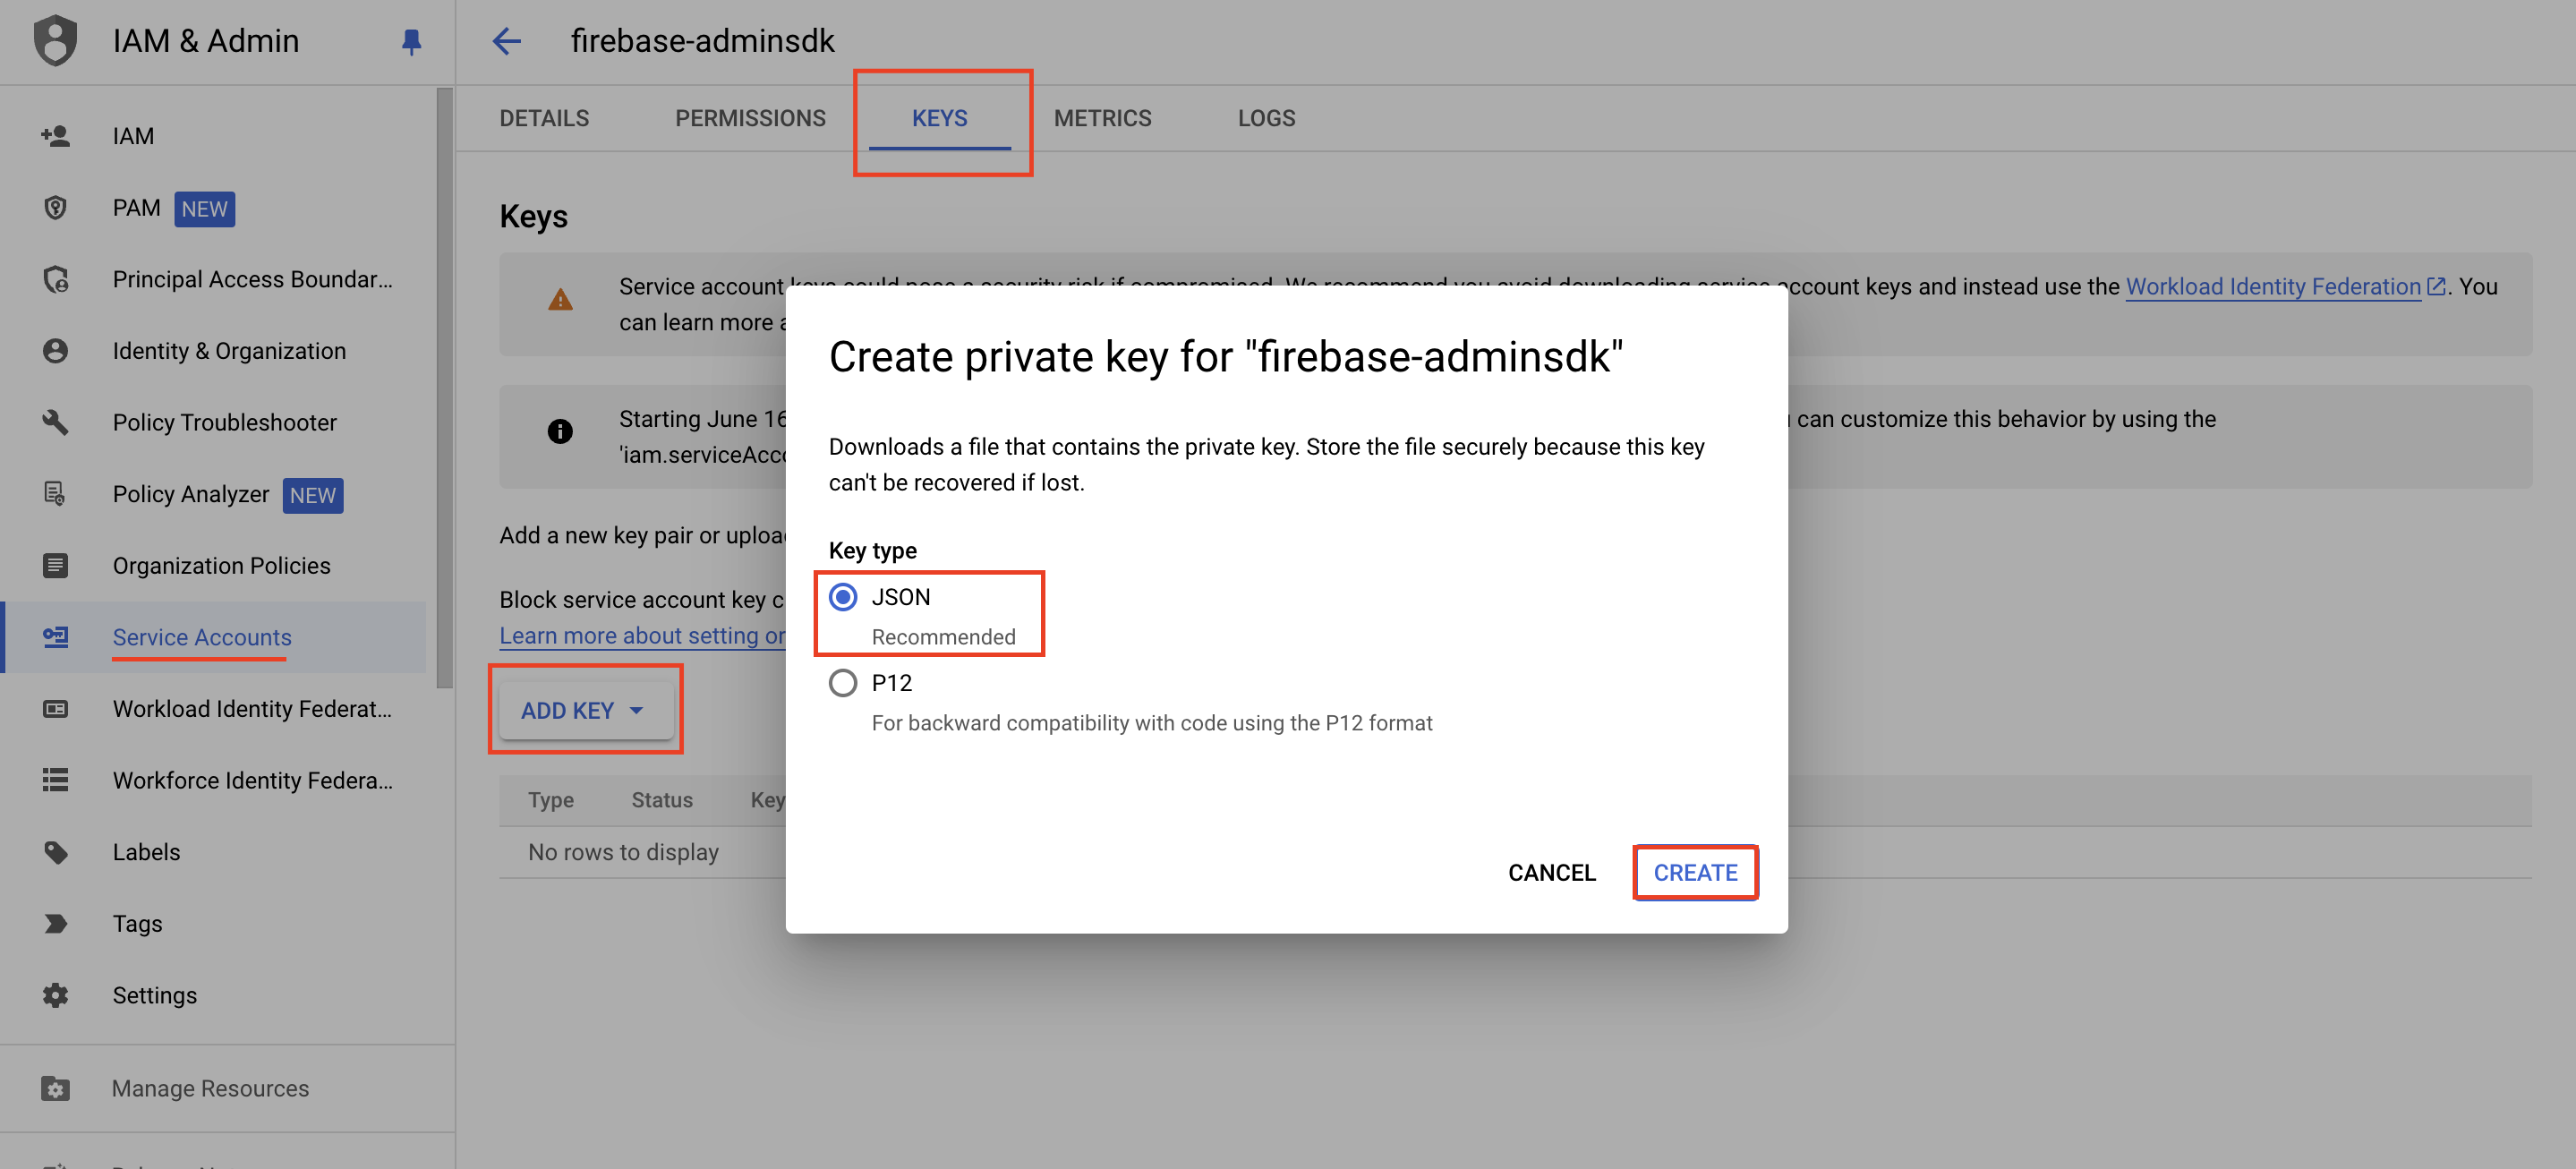
- Choose tab KEYS, click "Add key" -> "Create new key" and download json file.
Note
- After complete all step Setup. Please send information to dev of Tel4vn in here
- Please check PORTAL_GUIDE.md to setup your config.
Installation (your project)
- Install Packages
flutter pub add flutter_callkit_incoming
- Add pubspec.yaml:
dependencies:
      flutter_callkit_incoming: any
Config your project
- Android In android/app/src/main/AndroidManifest.xml
<manifest...>
     ...
     <!--
         Using for load image from internet
     -->
     <uses-permission android:name="android.permission.INTERNET"/>
 </manifest>
- IOS In ios/Runner/Info.plist
<key>UIBackgroundModes</key>
<array>
    <string>processing</string>
    <string>remote-notification</string>
    <string>voip</string>
</array>
Replace your file ios/Runner/AppDelegate.swift with
https://github.com/tel4vn/pitel-ui-kit/blob/main/ios/Runner/AppDelegate.swift
Usage
- Before handle Incoming call, you should import package in home screen
import "package:flutter_pitel_voip/flutter_pitel_voip.dart";
- Initialize firebase
void main() async {
  WidgetsFlutterBinding.ensureInitialized();
  await PushNotifAndroid.initFirebase(
    options: DefaultFirebaseOptions.currentPlatform,
  ); // add here

  runApp(MyApp());
}
-
Config firebase_options.dart. example.
-
Get device push token VoIP.
await PushVoipNotif.getDeviceToken();
- Get fcm token.
await PushVoipNotif.getFcmToken();
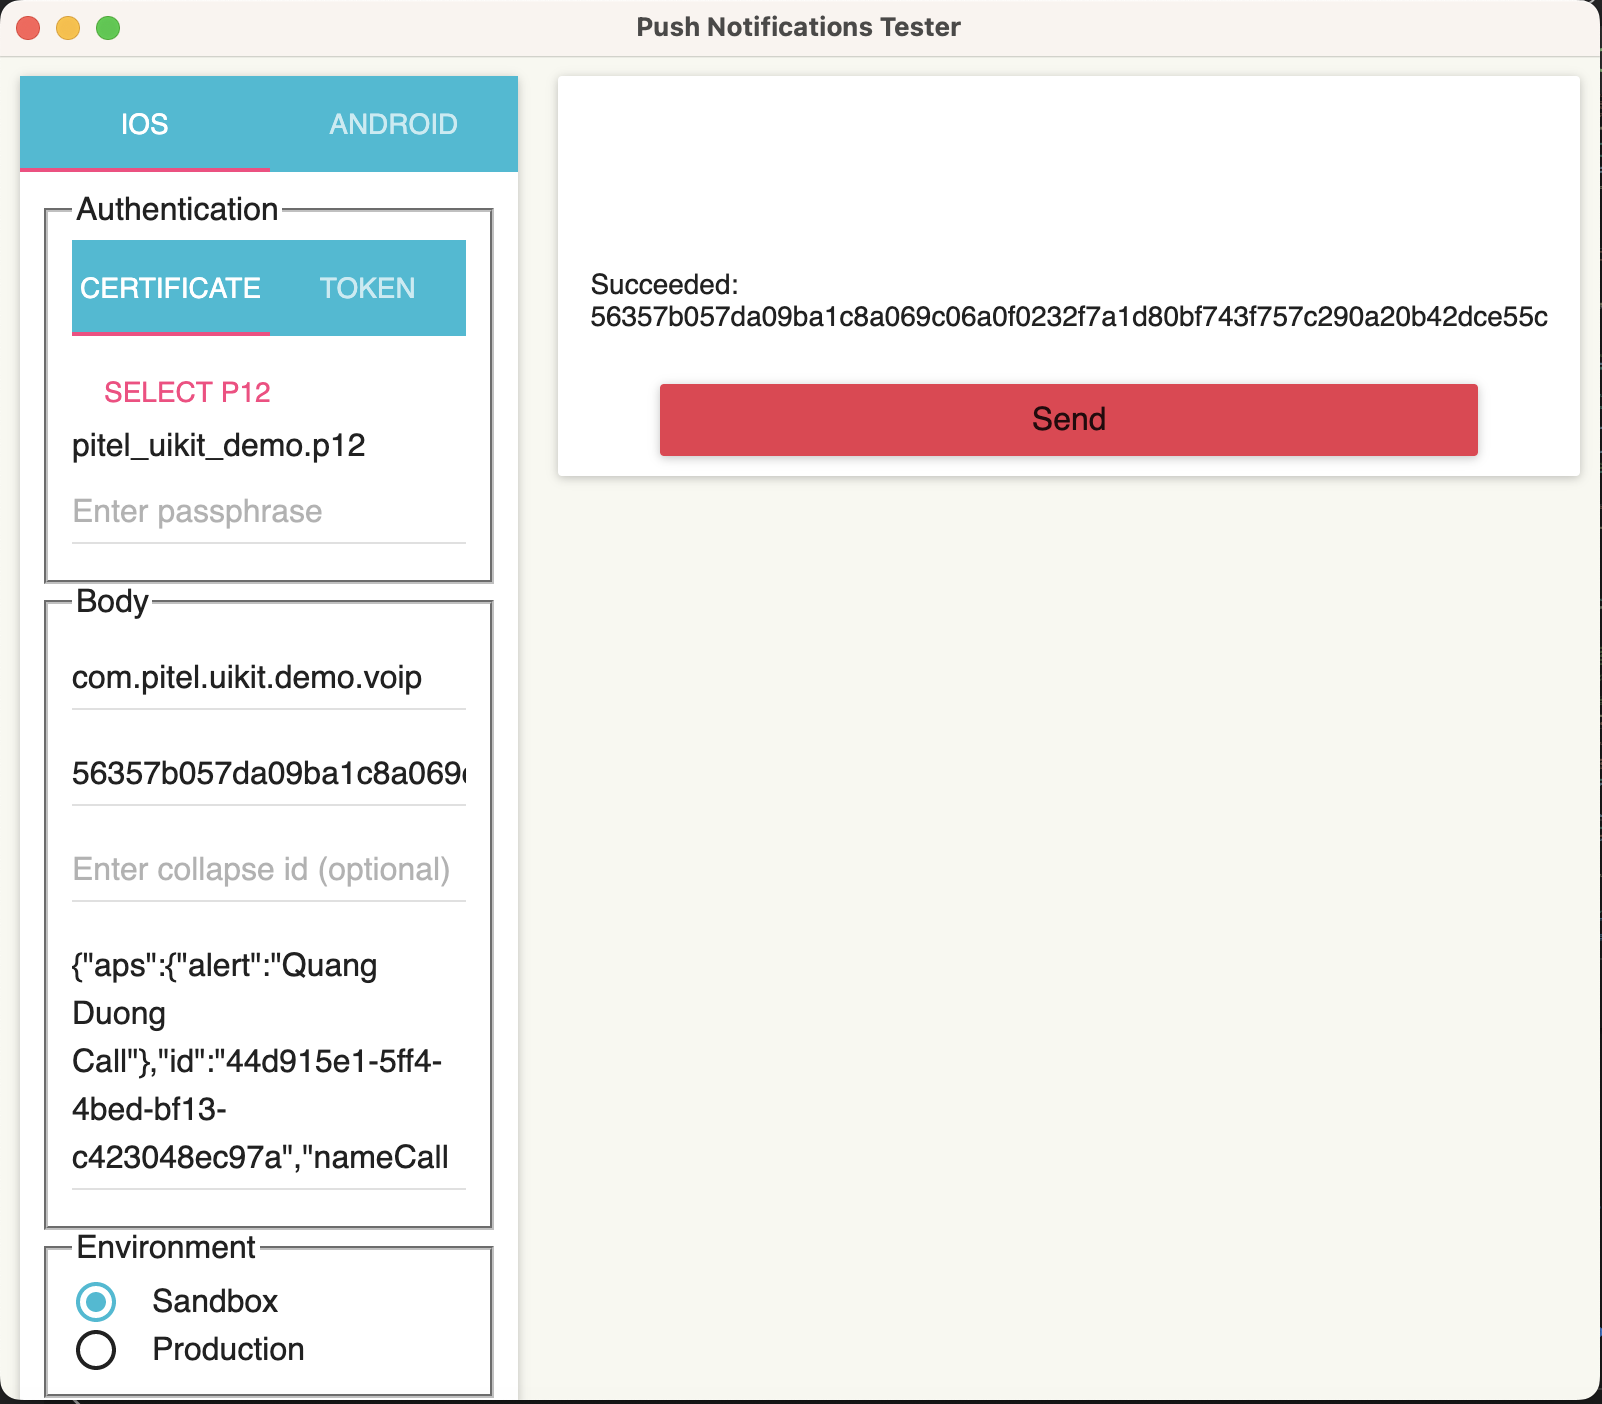
How to test
- Download & install app from link https://github.com/onmyway133/PushNotifications/releases

- Fill information and click Send to Test Push Notification
Note: Add .voip after your bundleId to send voip push notification
Example:
Your app bundleId: com.pitel.uikit.demo
Voip push Bundle Id: com.pitel.uikit.demo.voip
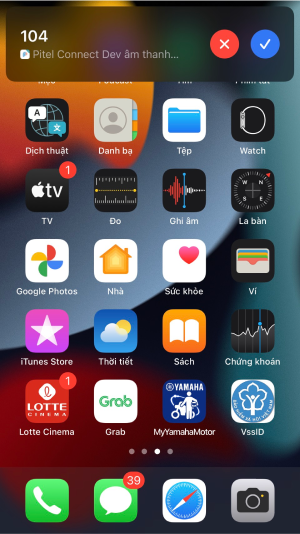
IOS
Android: using above app or test from Postman
How to get access token?
- Go to https://developers.google.com/oauthplayground/
- Navigate to Step 1 (Select & authorize APIs) → Select “Firebase Cloud Messaging API v1” and click “Authorize API’s” button.
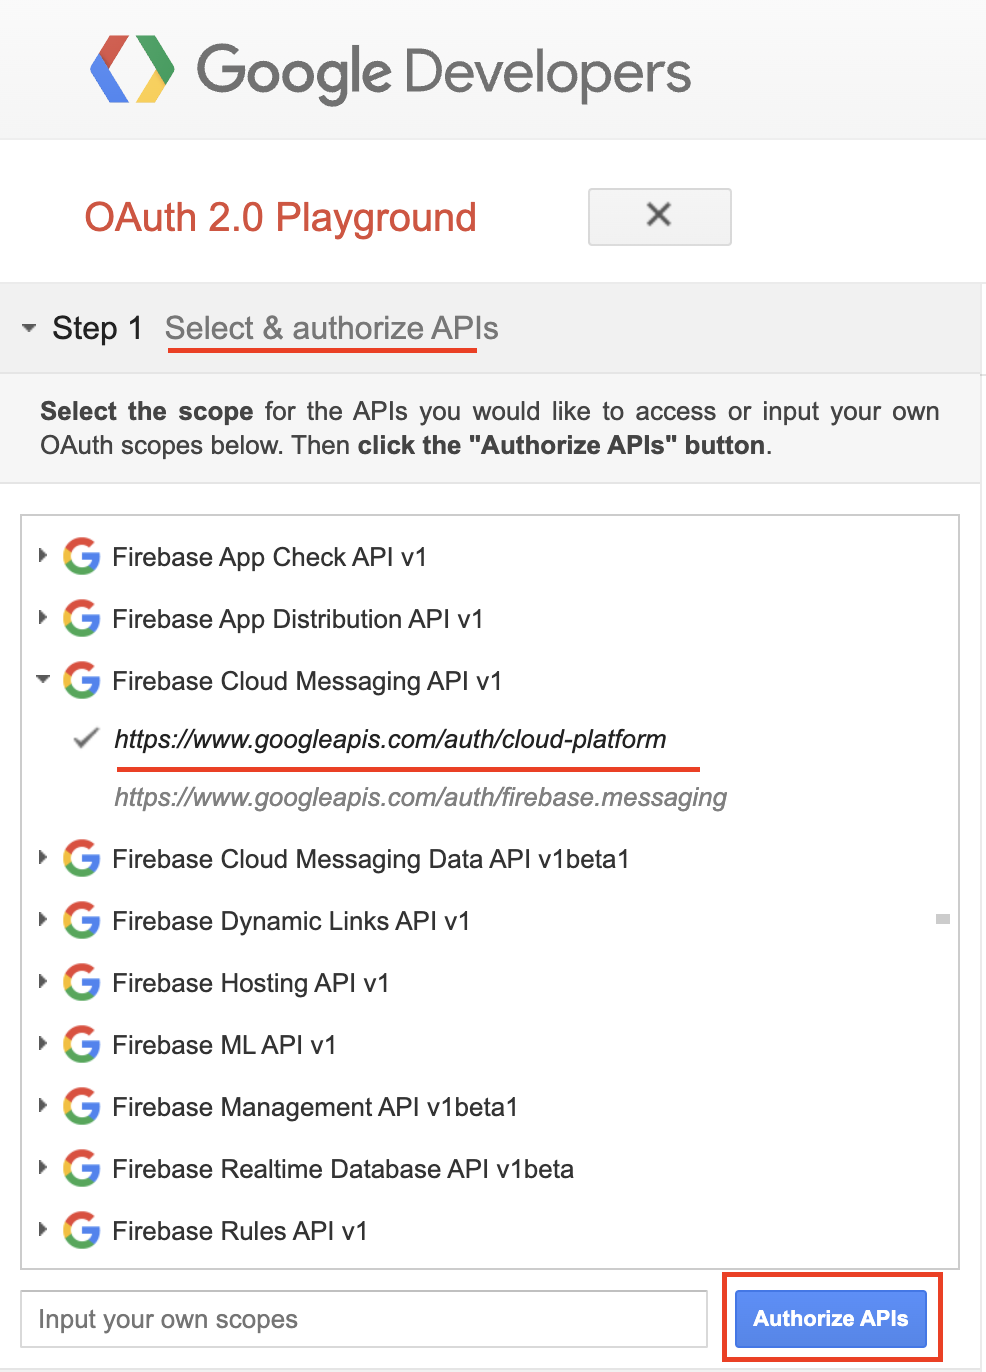
- You will be redirected to Authentication and needs permission for Google OAuth 2.0 Playground to view and manage the GCP services. Click “Allow” button.
- Navigate to Step 2 (Exchange authorization code for tokens) → Click “Exchange authorization code for tokens” button.
This will generate “Refresh token” and “Access token”.

Note:
- project_id: this is your firebase project id.
- fcm_token: replace your fcm token, get from your device.
- access_token: get access token from oauth playground above.
cURL
curl --location 'https://fcm.googleapis.com/v1/projects/${project_id}/messages:send' \
--header 'Content-Type: application/json' \
--header 'Authorization: Bearer ${access_token}' \
--data '{
    "message": {
        "notification": {
            "title": "FCM Message",
            "body": "This is an FCM Message"
        },
        "data": {
            "uuid": "77712f3-9b56-4e26-96ea-382ea1206477",
            "nameCaller": "Pitel SDK",
            "phoneNumber": "101",
            "appName": "Pitel Connnect",
            "callType": "CALL"

        },
        "apns": {
            "headers": {
                "apns-priority": "1",
                "sound": ""
            },
            "payload": {
                "aps": {
                    "mutable-content": 1,
                    "content-available": 1
                }
            }
        },
        "android": {
            "priority": "high"
        },
        "token": "${fcm_token}"
    }
}'